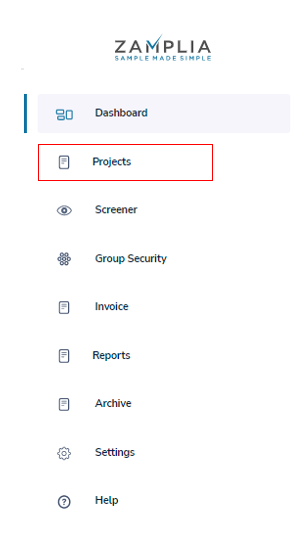
Projects Tab
You can locate your projects and the current status of each project in the Projects tab.
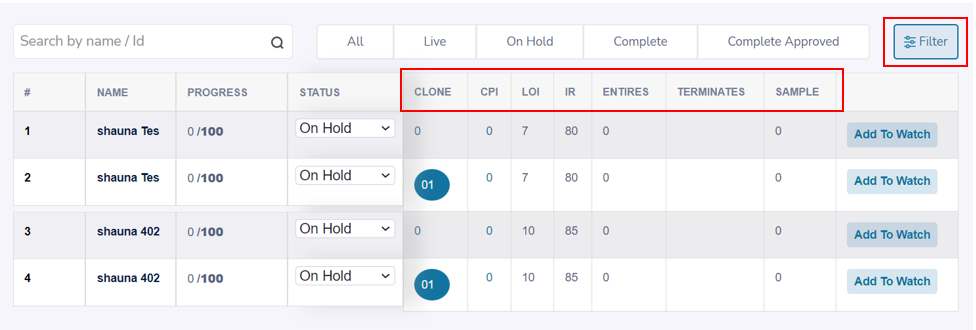
In the Projects tab, you’ll be able to see the following sections:
A. All - The All section displays all of your projects set up on Zamplia..
B. Live - Live shows all active projects in the field.
C. On Hold - On Hold shows projects that are currently paused.
D. Complete - Complete displays projects that have been completed but are waiting to be reconcile.
E. Complete Approved - Complete Approved section shows all projects that have been reconciled and closed and are ready to be billed.
Helpful Hint: Please keep your projects organized and updated in the appropriate section for each status change during the project’s life cycle.
In the top right corner of the Project Tab, you'll find a 'Filter' button. Using this, you can add or remove columns that you want displayed for each project item in the system.
Project Setup
To set up a project on Zamplia, simply follow the step-by-step instructions provided. The process is user-friendly and straightforward.
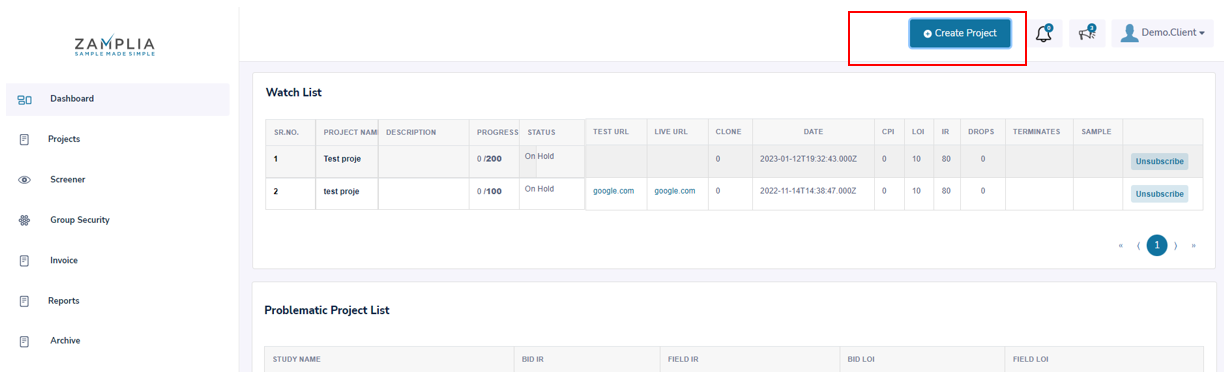
To start a new project on the platform, click on the "Create project" button. Here you’ll be able to check Zamplia's feasibility or go ahead with launch.

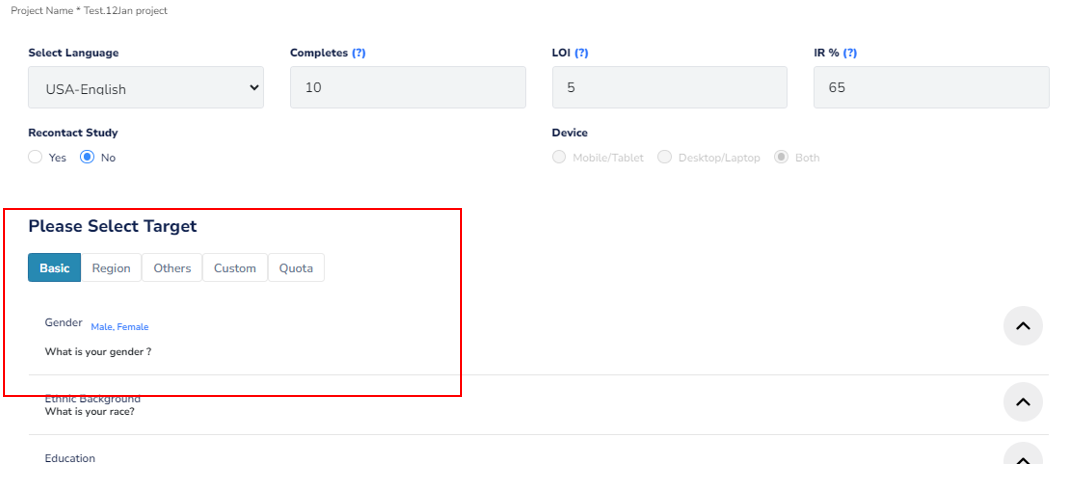
Next, fill in the project specifications.
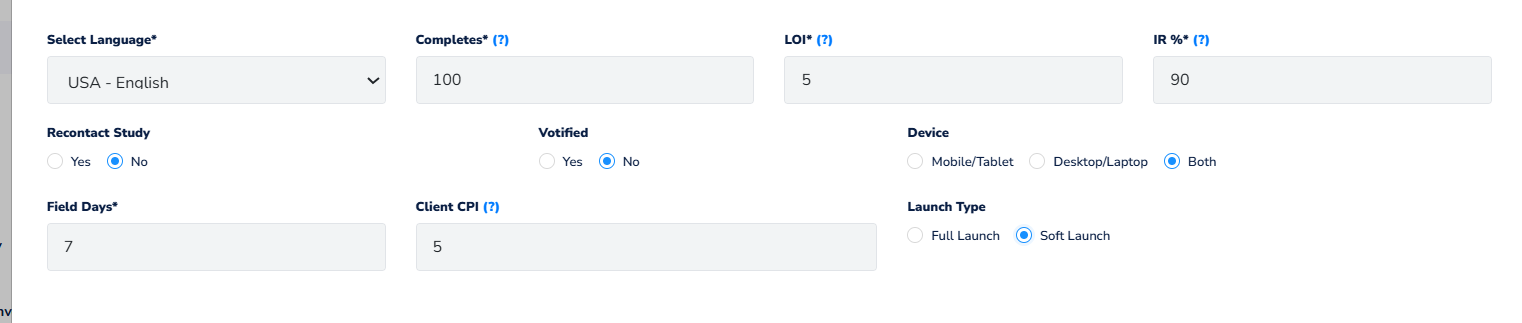
A. Select Language - Choose a language and region for your project.
B. Completes - Input the desired number of participants (completes) for your study.
C. LOI - Enter the length of the interview (LOI).
D. IR - Specify the incidence rate (IR), which is the probability of participants completing your survey after being targeted for the required demographics.
E. Recontact Study - Decide if you want to enable recontact, which allows you to re-engage the same participants in future study. Recontact studies allow you to collect updated data from the same participants and compare their responses over time.

Choose the target audience for your study:

Basic - Listed here are the top most used qualifications on our platform. It is important to always include Gender and Age as the qualification in all of your set-ups.
Region - Narrow down your target using various regional breakouts available in Zamplia.
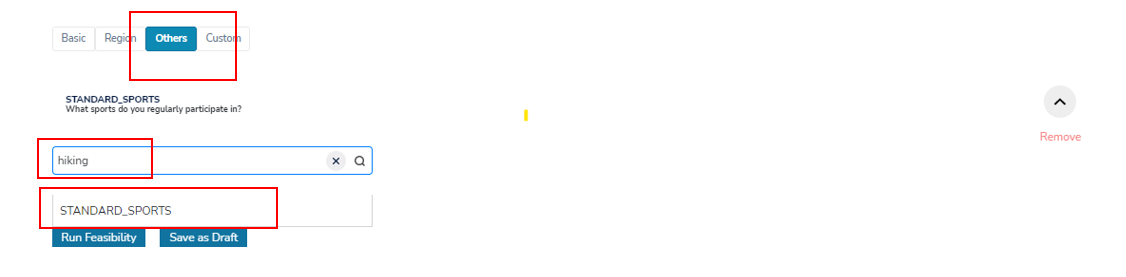
Others - Search for additional qualifications using keywords, as Zamplia offers over 100 qualifications to choose from.
To target individuals who hike, for example, type "hiking" as a keyword in the search to find related qualifications.
Custom - Allows you to create your own screener to help screen out respondents who run through your study. To learn more about Custom Screener select here.
Apply quotas on the qualifications you selected for your study. To learn more about Quotas select here.
Ready to launch? Hit Create Project Or Simply Save for later.

A. Click Run Feasibility - Zamplia will generate a report based on the available vendors matching your selections, including the vendor's sample sizes and their set rates for your project requirements.
B. Save as Draft - Select Save as Draft if you wish to save your progress to continue later
Select Vendor - Choose the vendors you want to use for your study. Quotas will be automatically assigned to the selected vendors and will be evenly split among them. You can overwrite and revise the allocated quotas if needed.

Ready to launch? Or Simply Save for later. A. Create Project - This will initiate the next steps for project set up. B. Save as Draft - Select Save as Draft if you wish to save your progress to continue later.
Project name - Name your project under "Project Name”. Please ensure the name is unique and not used in any previous project setups.
Category – Indicate the topic of your study in the "Category" field.
Select Study type – Specify if your study is an Adhoc or Tracker study under "Select Study Type."
Choose the security features you want to include in your Zamplia setup:
A. Survey Length Speed check - Allows you to monitor the speed at which a respondent completes the survey. They will receive a security termination if they answer too quickly.
In the example below, 2 minutes has been indicated for our speed check.

B. Calibr8 - Calibr8 is our proprietary fraud detection engine, built to safeguard the quality and reliability of your survey results. The "8" in Calibr8 represents the eight key metrics used to screen respondents before they reach your survey.
Just toggle it on when setting up your next Zamplia project — and let Calibr8 do the heavy lifting in keeping your data clean.
Eight Key metrics :
1. Global Restrictions
Detects VPNs, proxies, duplicate IPs, and improper geolocation to ensure data authenticity.
2. Metadata Scoring
Validates device and operating system fingerprints to prevent duplicate entries and fraudulent activity.
3. Open-End Review
Flags irrelevant, nonsensical, or low-effort responses in open-ended questions to maintain response quality.
4. AI Detection
Blocks AI-generated responses to ensure genuine human feedback.
5. Biometrics
Monitors keystroke and mouse movement patterns to detect irregular or automated behavior.
6. Coherency Scoring
Assesses logical consistency across related questions to ensure the reliability of responses.
7. Behavioral Data Monitoring
Tracks shifts in respondent behavior and flags potentially compromised panelists.
8. Red Herrings
Uses trick questions to identify inattentive or disengaged respondents.
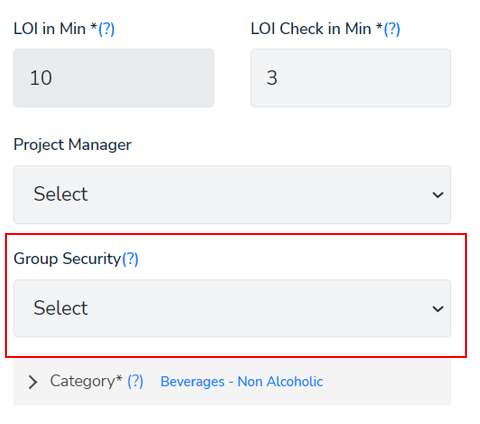
C. Group Security check - Prevents duplicates from one study to another by cross-checking completions from different studies. If you have completed coming into study A and don't want them completing in study B, you can apply the group security to both studies and it will help you cross check and prevent any duplications. Click here to learn more about Group Security.
Link Setup - Choose the type of URL setup your survey requires. Be sure to implement Zamplia endlinks in your survey before continuing with your URL set up on Zamplia. For additional information on link set up please select here.
Static Link - Zamplia offers support for studies that require an open link. Open link means you’ll only be passing back the panelist ID to Zamplia.
Pinned Link - Zamplia supports studies that require unique links.
QA instructions - Some vendors may require a complete test before launching a sample for your project. Type in instructions on the best stream to test for completions and include any non-targetable qualifications (e.g., "QA: +18, Male, Must work from home at least 2 times a week").

Client PO - Input your project’s PO in the designated field. This will serve as reference during invoicing.
Ready to launch? Or Simply Save for later. A. Create Project - This will initiate the next steps for project set up. B. Save as Draft - Select Save as Draft if you wish to save your progress to continue later.
Review your project settings - Once you are in the project page, review and verify all the settings that you assigned to your project.
Test your project - We always recommend that your test your project to ensure that your Zamplia redirect set up is correct. To learn more about testing select here.
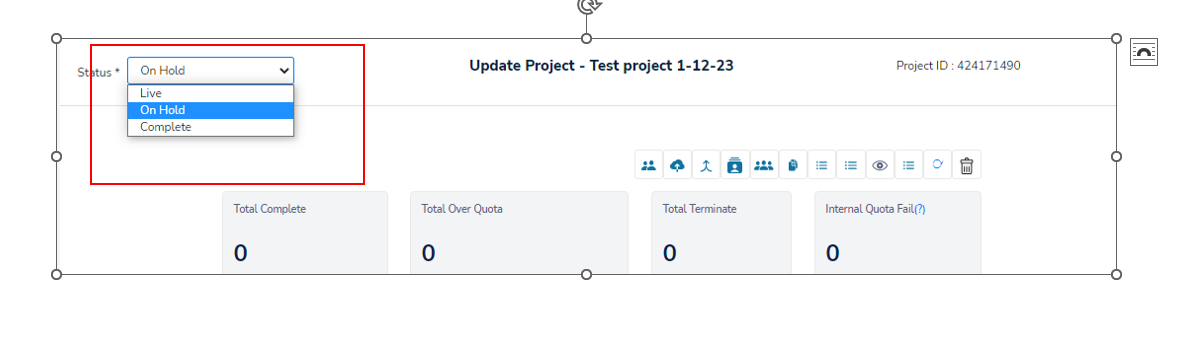
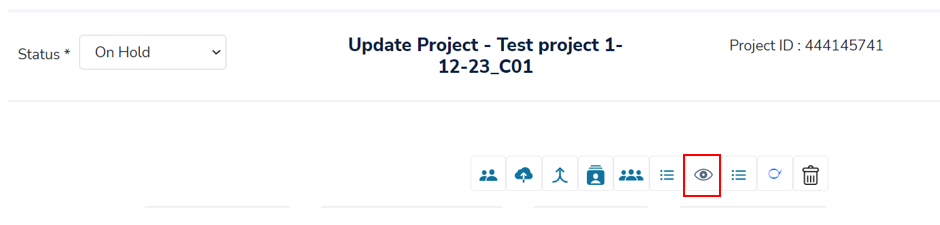
Change study status - Change the status of your study from "On Hold" to "Live". The vendors will be notified to launch sample for your study.
=======================================
Zamplia Soft Launch Functionality
1. What Is Soft Launch?
Soft Launch is a new feature in the Zamplia platform that allows you to test your survey with a smaller sample size before fully launching it. This helps you validate:
- Survey logic
- Question flow
- Quota distribution
- Respondent experience
- Data quality
Once you are confident everything looks good, you can seamlessly switch the survey to Full Launch.
2. How Soft Launch Works in Zamplia
You will begin by creating your survey exactly as you normally do on Zamplia.
Example: You are planning a survey with 1000 completes (1000N).
Before fully launching it, you want to run a small-scale soft launch.
To switch to soft launch, simply toggle the Soft Launch option as shown in the platform.
 Once switched, Zamplia will:
- Automatically convert your full sample size into 10% soft launch sample.
- Automatically adjust quotas based on 10%.
Example:
Full Launch N = 1000
Soft Launch N = 10% of 1000 → 100 completes
3. How Quotas Work During Soft Launch
Zamplia automatically adjusts quotas to 10% when you enable soft launch.
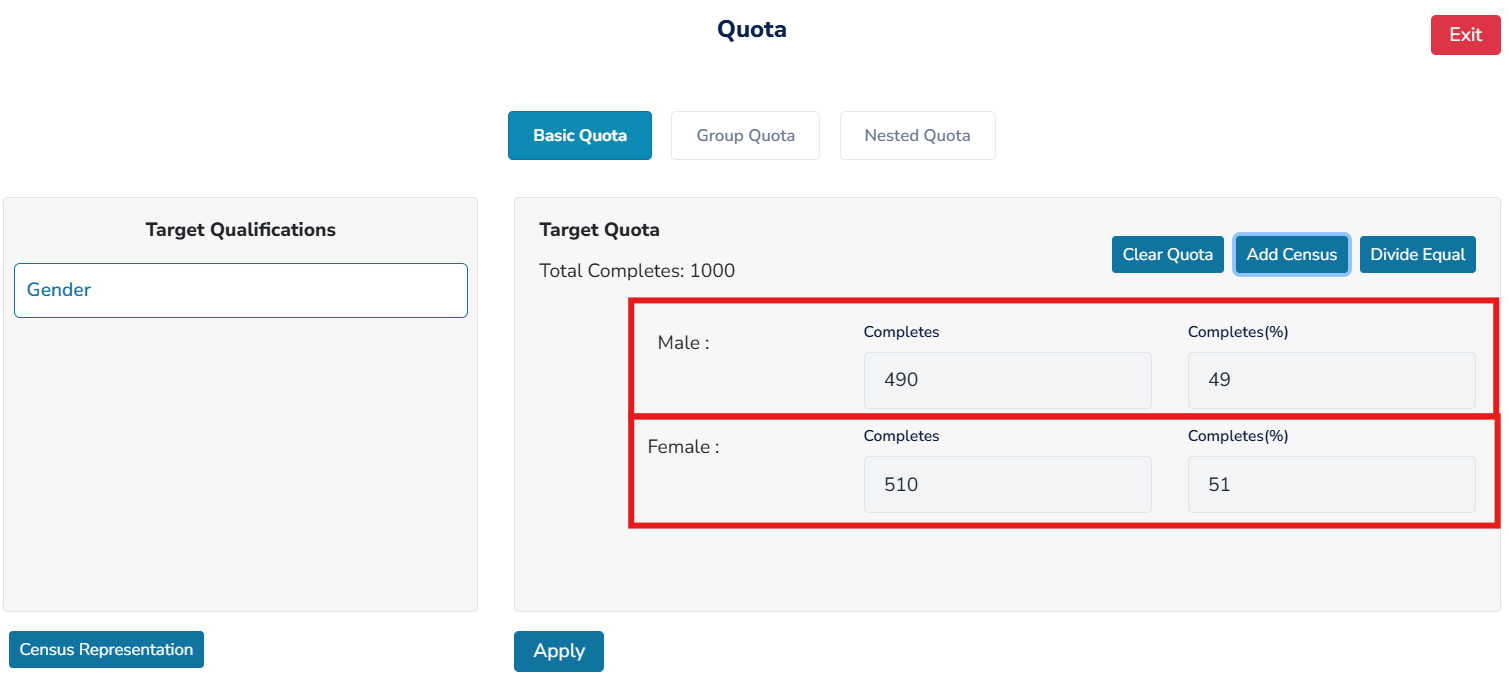
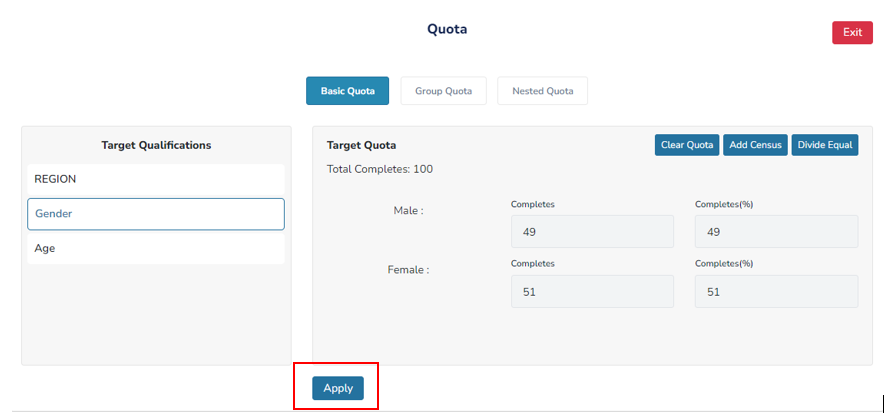
Full Launch Quota Example:
- Male: 490N
- Female: 510N
Soft Launch Quota (10%):
- Male: 49N
- Female: 51N
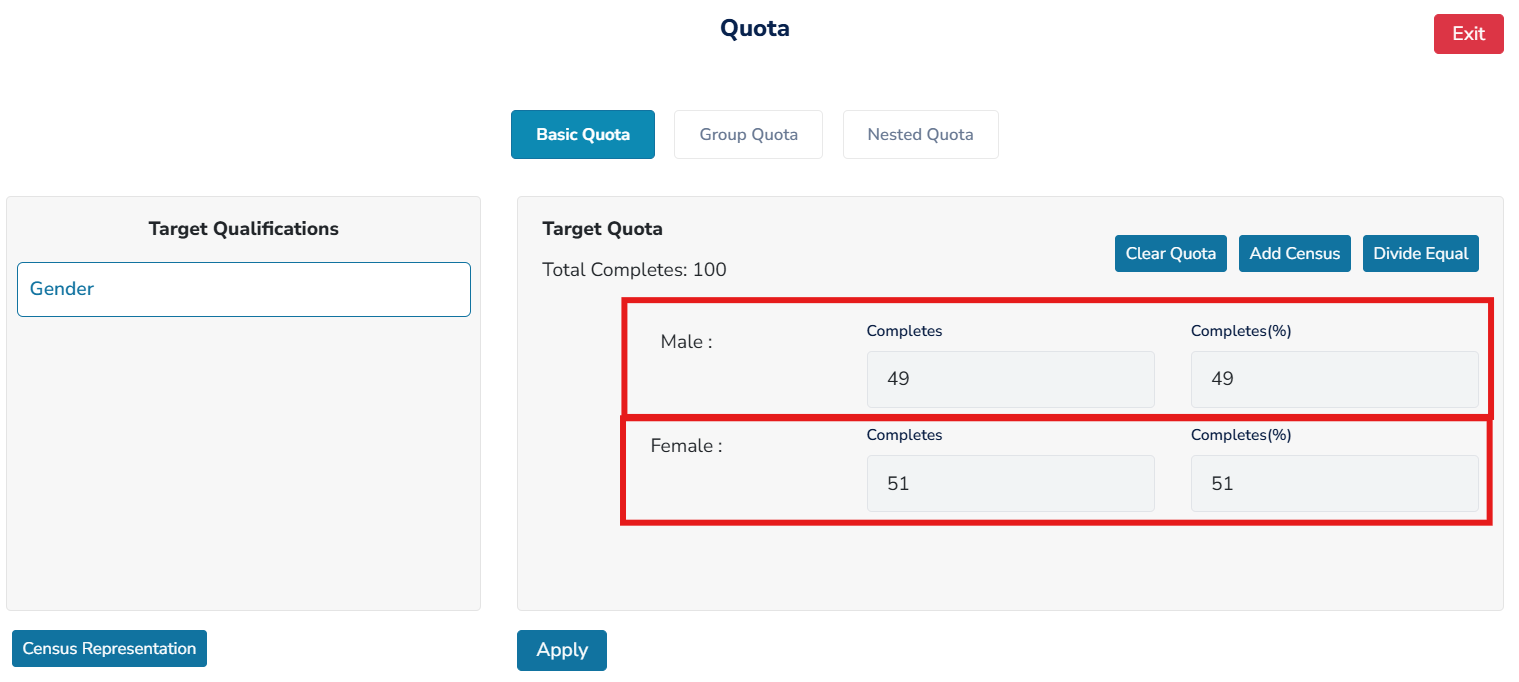
You do not need to manually recalculate quotas—Zamplia handles it for you.
4. Switching From Soft Launch to Full Launch
Once your soft launch completes (minimum one complete is required), you can switch to a full launch.
Steps:
- Follow the usual process of updating your project through the Project API.
- Change the survey status to Full Launch.
- The system will automatically activate full sample size and full quotas.
Important: You cannot switch a survey back from full launch to soft launch.
Note: Your soft launch must have at least one complete before switching to full launch.
Advanced UI Suggestions (Optional)
- You can add styled tables for quota visualization.
- Add interactive toggles or progress bars for Soft vs Full Launch N.
- Highlight important notes using Markdown callouts or emojis.
This Markdown file preserves all your text and can be rendered in any Markdown viewer or documentation platform.
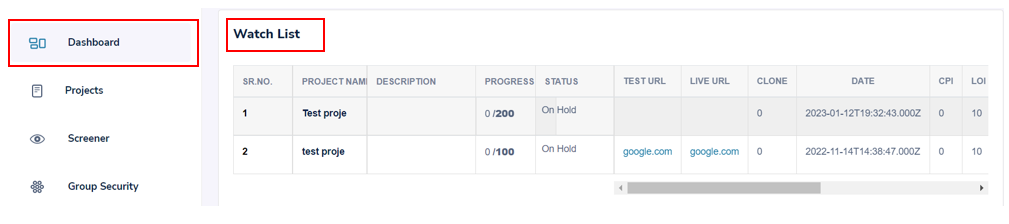
Watch List
All studies you have subscribed to will be listed on the main dashboard for quick access. If you are assisting another manager with their study, you can subscribe to the project and have it added to your watch list on the dashboard.
By subscribing, you will also receive updates and notifications on the project's status and any other relevant changes.
Subscribing
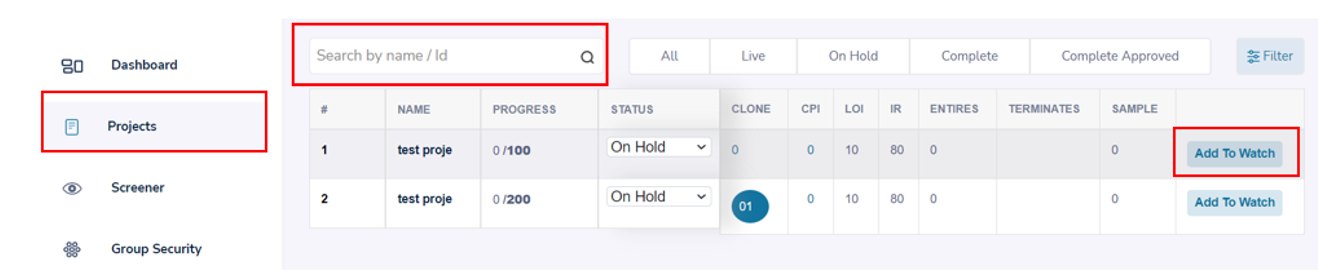
Identify the project - Go to the Projects tab to find the project you wish to subscribe to.
Search the project - Utilize the search bar to search for the desired project by name.
Add to Watch - Choose the option 'Add to Watch' for the specific project you want to subscribe to.
Watch List - The project will now appear on your Dashboard for quick access.
Unsubscribing
Identify the project - Locate the project you would like to unsubscribe from your Watch List.
Unsubscribe - Choose the option ‘Unsubscribe’ next to the project name.
Problematic Project List
For studies that you set up or had subscribed to, you will receive alerts if any deviation from the project specifications occurs. Projects will be alerted for the following:
● Incidence Rate (IR) alerts - You will receive an alert if there is a variance of +/- 10% between the field IR and the BID IR.
● Length of Interview (LOI) alerts - You will receive an alert if there is a variance of +/- 5 minutes between the field LOI and the BID LOI.
In the example below, Zamplia is informing the project manager about the difference between the field IR and the BID IR.
Helpful Hint: If you receive an alert for a difference, it is recommended that you update your specifications in the Project (API). Keeping your specifications current and approving the related cost will assist in bringing the project back on track.

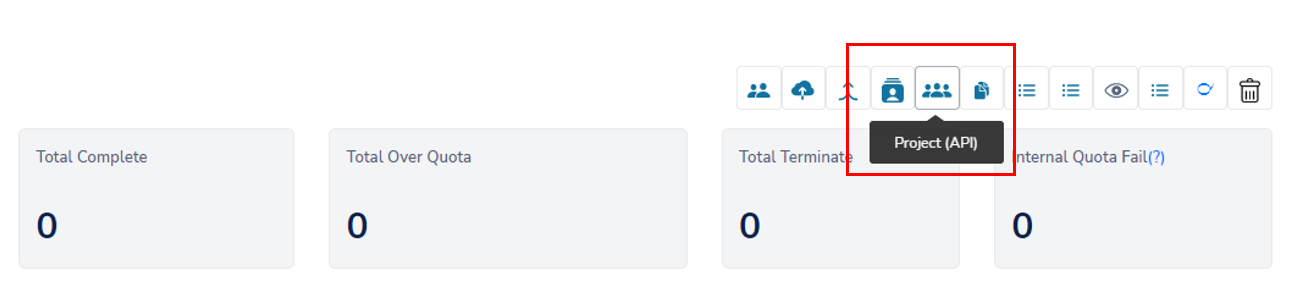
Locating Quota Tab
In order for Quotas to be established, your project must already have your targeted qualifications selected under Project (API).
a. Create Project - If this is a new setup, you'll locate targets in the Quota tab after selecting Create project.
b. Project (API) - If this project already exist, you can apply quotas to your qualification by clicking back into Project (API) to review your targets.
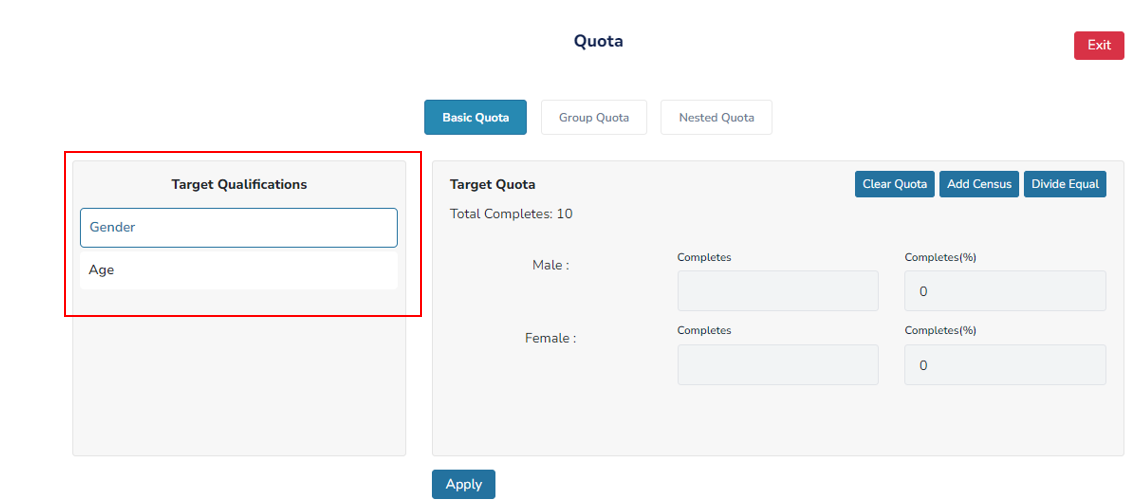
Individual Quotas
Assigning quotas to a single qualification in your project.
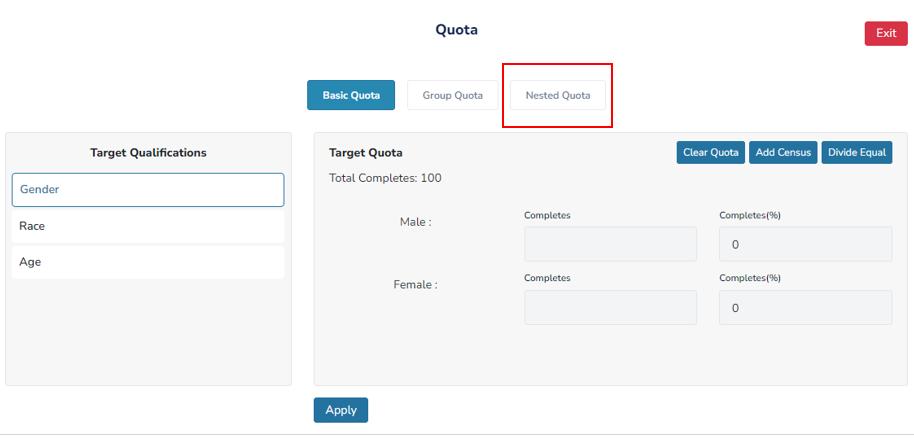
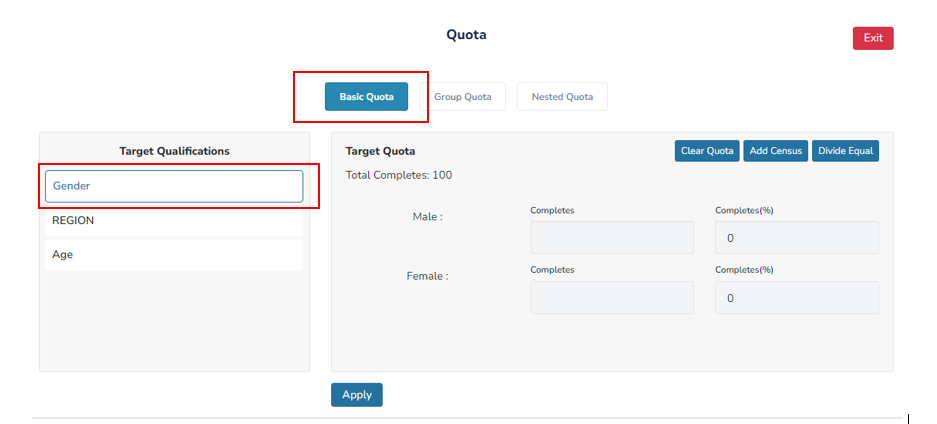
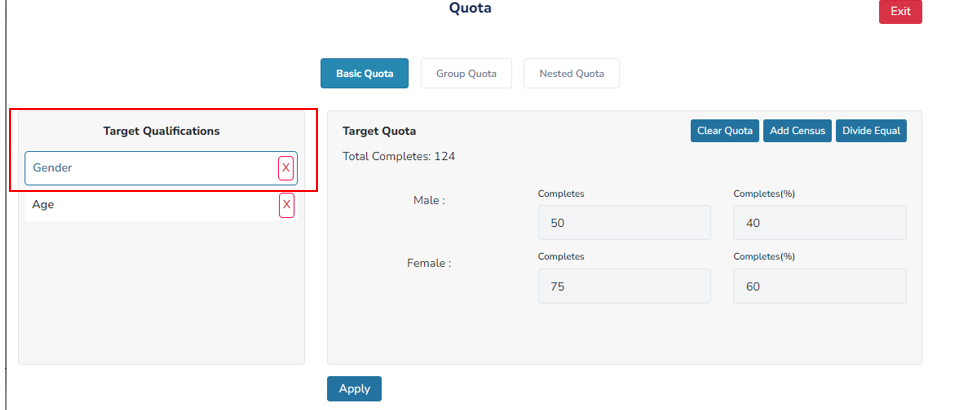
Basic Quota - Select the 'Basic Quota' tab to assign individual quotas.

Target Qualifications - Toggle between different target qualifications to assign quotas to them.
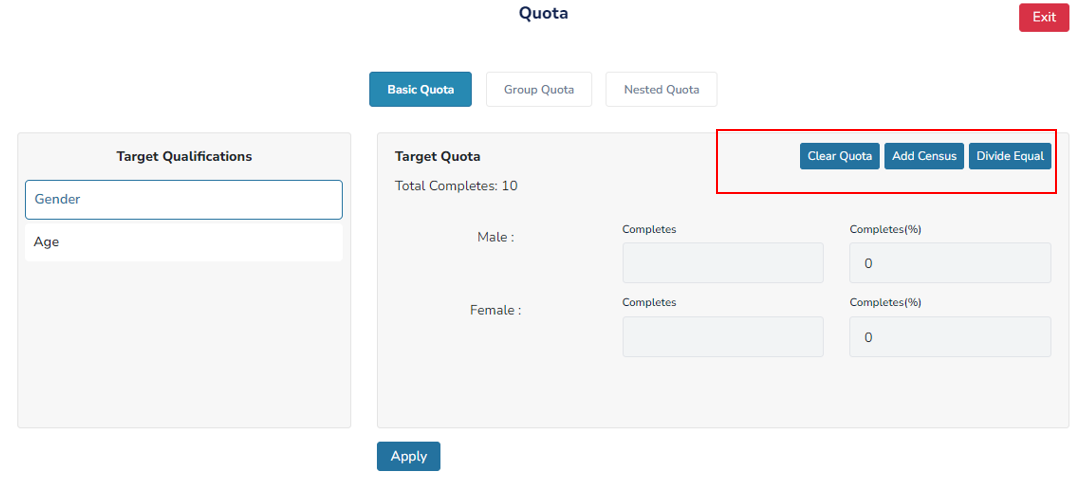
A. Clear Quota – This option will remove all quotas for your selections, resulting in open quotas without any restrictions.
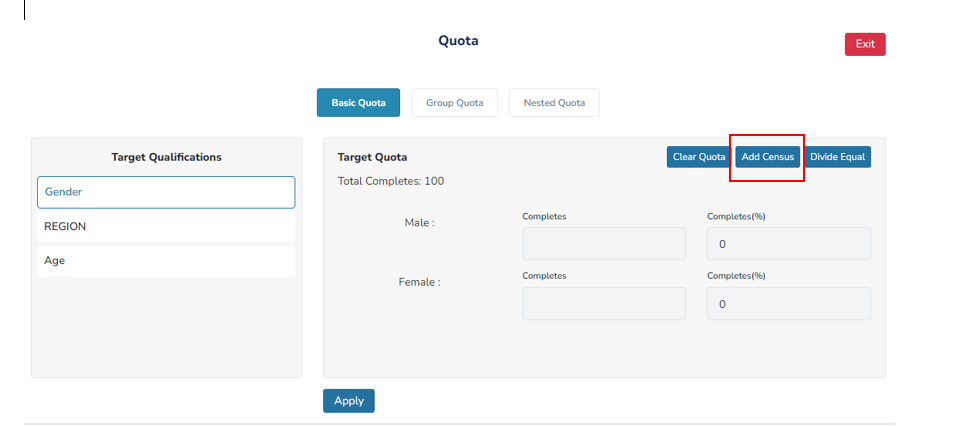
B. Add Census – This option enables you to automatically add quotas to your qualification based on census data. Helpful Hint: Currently, census data is only available for targets of Gender, Age, and Region.
C. Divide Equal – This option allows you to divide the quotas equally among all of your selections within the qualification.
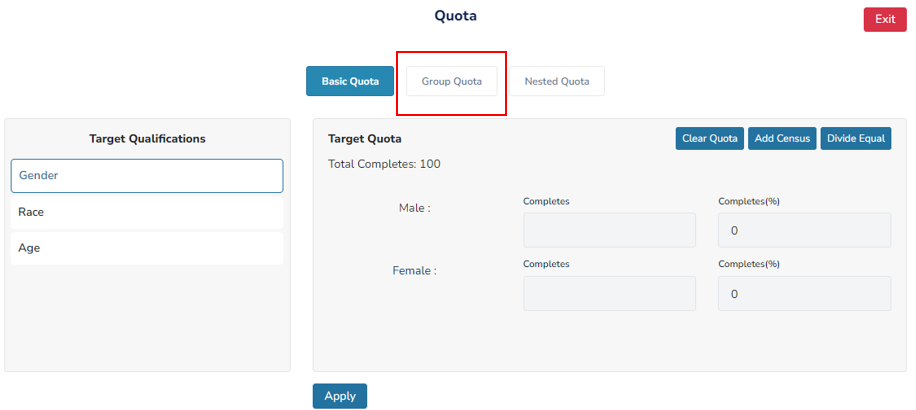
Group Quota
You may need to group option choices together to better target your demographic.
For example, consider a scenario where your study requires you to focus on Asian Americans without specifying their country of origin. In this case, you can use our group quota feature to consolidate the various choices listed under 'Race' into a single option.
Group Quota - Select the 'Group Quotas' tab to begin grouping option choices.
Group Name - Name the choices that are being grouped together.
Requirement - Set an amount you would like assigned to the group quota.
Project Qualifications - Locate the qualification you would like grouped under Project Qualification.
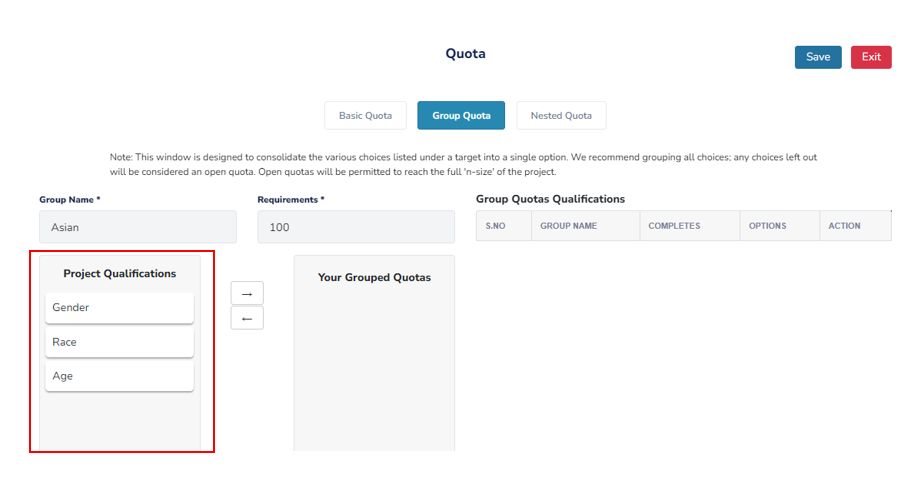
Your Grouped Quotas A. Drag and drop the qualification you would like to group from Project Qualification and drop it under Your Group Quotas.
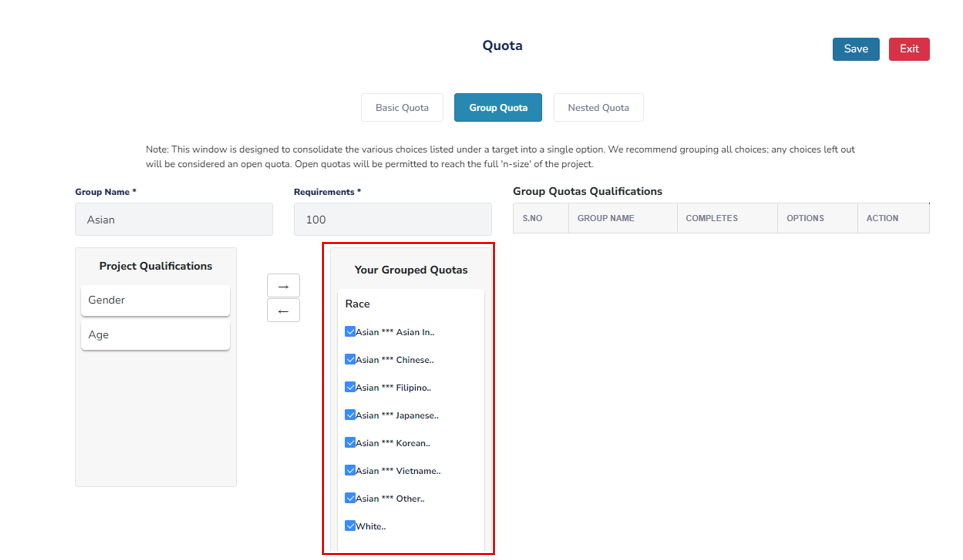
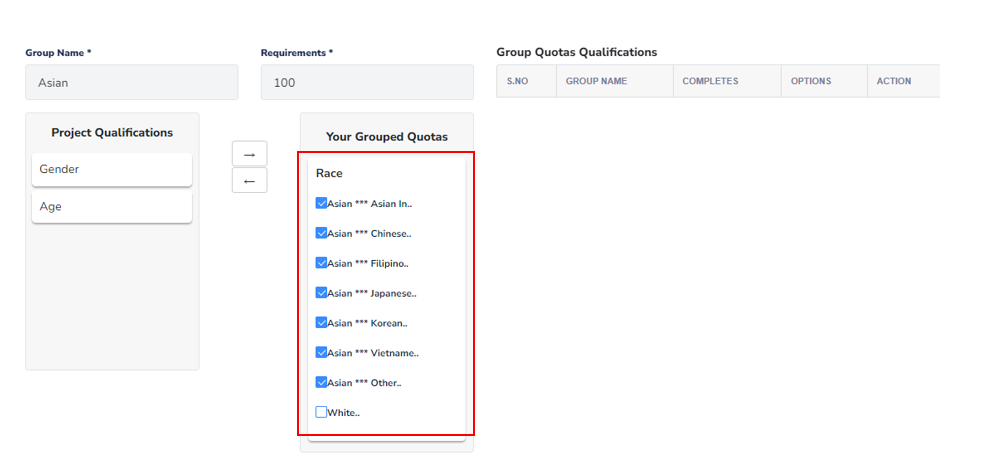
B. Select only the choices you would like grouped together. In our example below, we are only grouping respondents who identify as Asian. The option choice of 'White' has been left out of this grouping.
Select 'Save' to finish the grouping
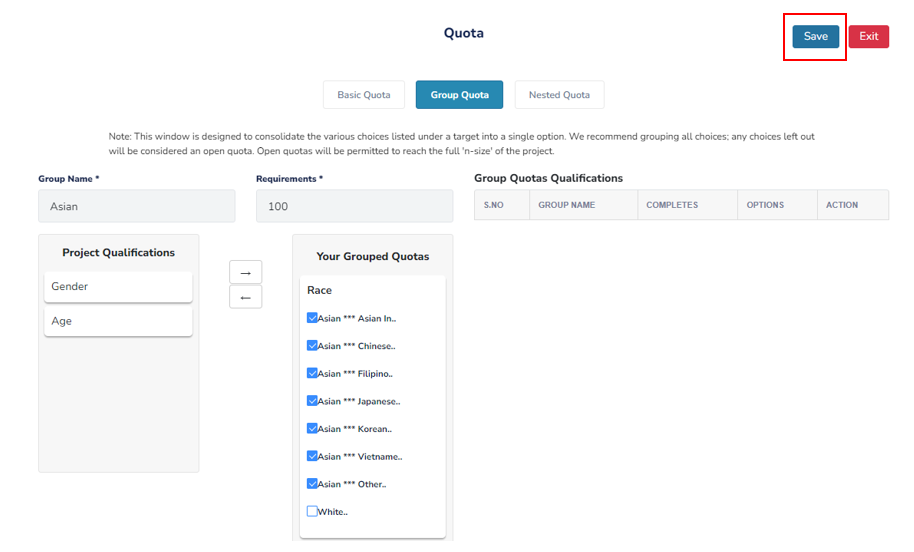
Group Quotas Qualifications - As you include new group quotas in your survey, your saved groups can be viewed under Group Quotas Qualifications.
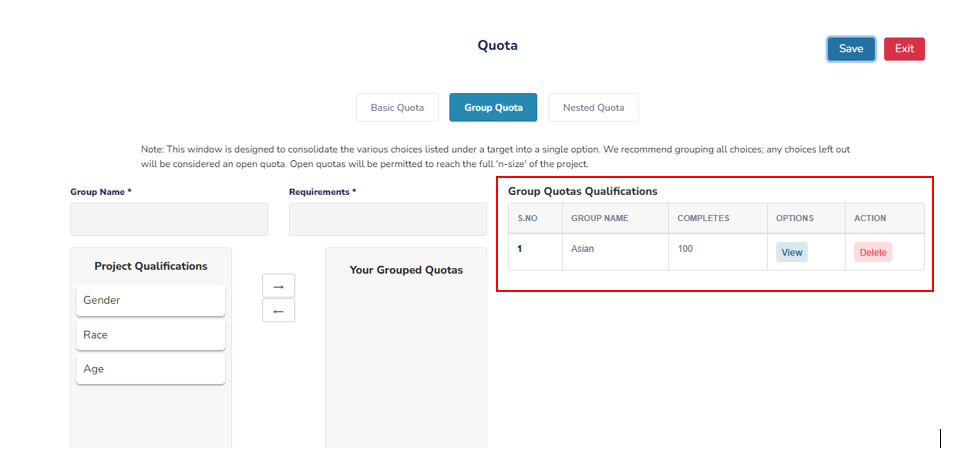
Helpful Hint: We recommend grouping all choices; any choices left out will be considered an open quota. Open quotas will be permitted to reach the full 'n-size' of the project.
Nested Quotas
Your project may need you to set up quotas for subgroups within larger groups.
As an example, consider a scenario where the larger targets are Age and Gender. In addition to these larger targets, you will also need to create subgroups such as "Males aged 18-25" and "Males aged 26-50." To create these subgroups, follow the steps outlined below.
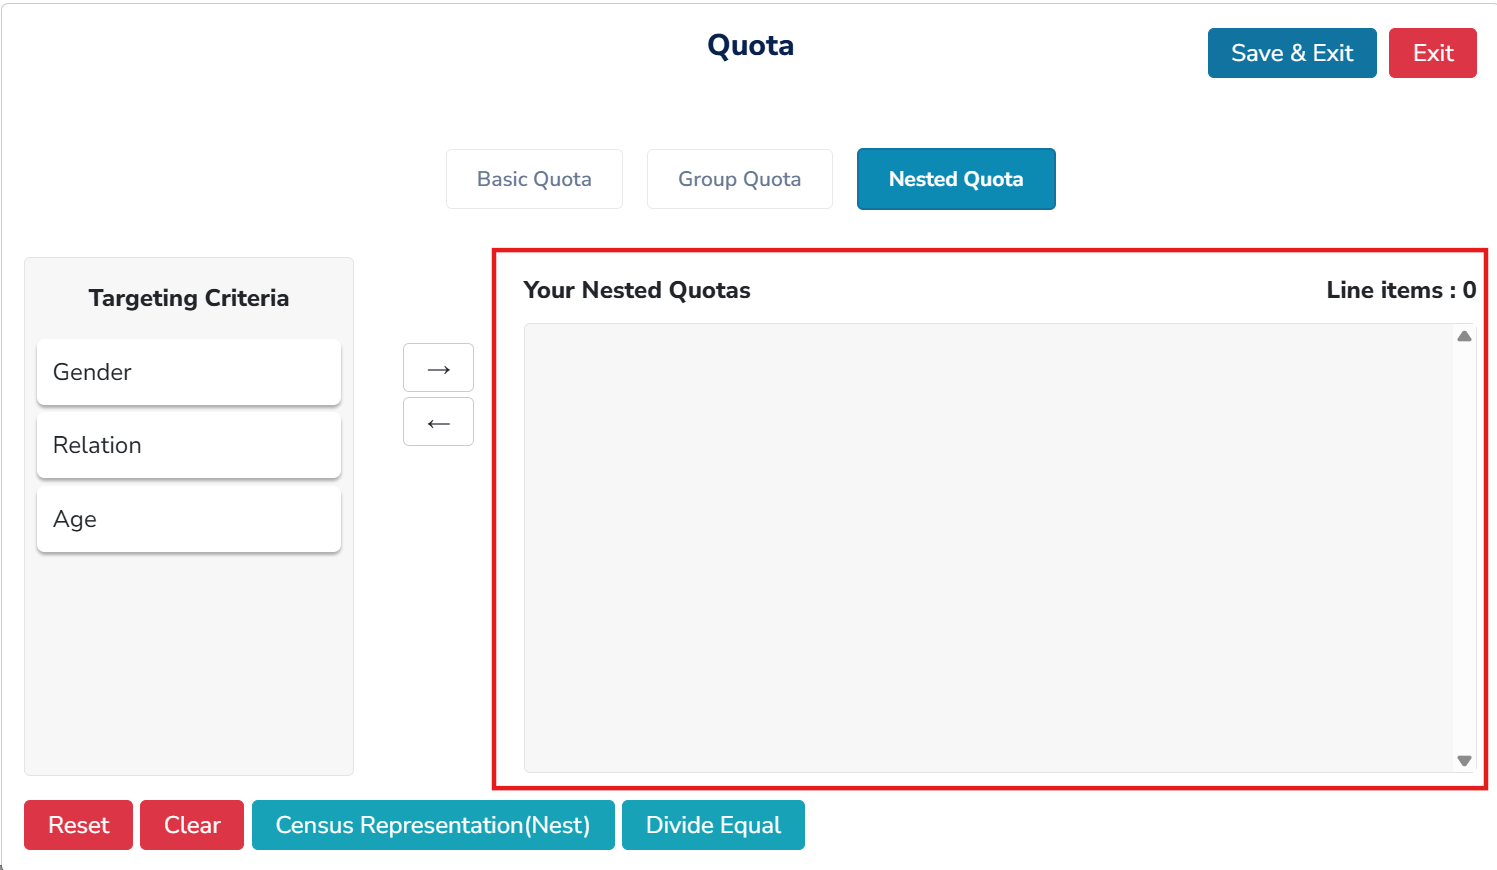
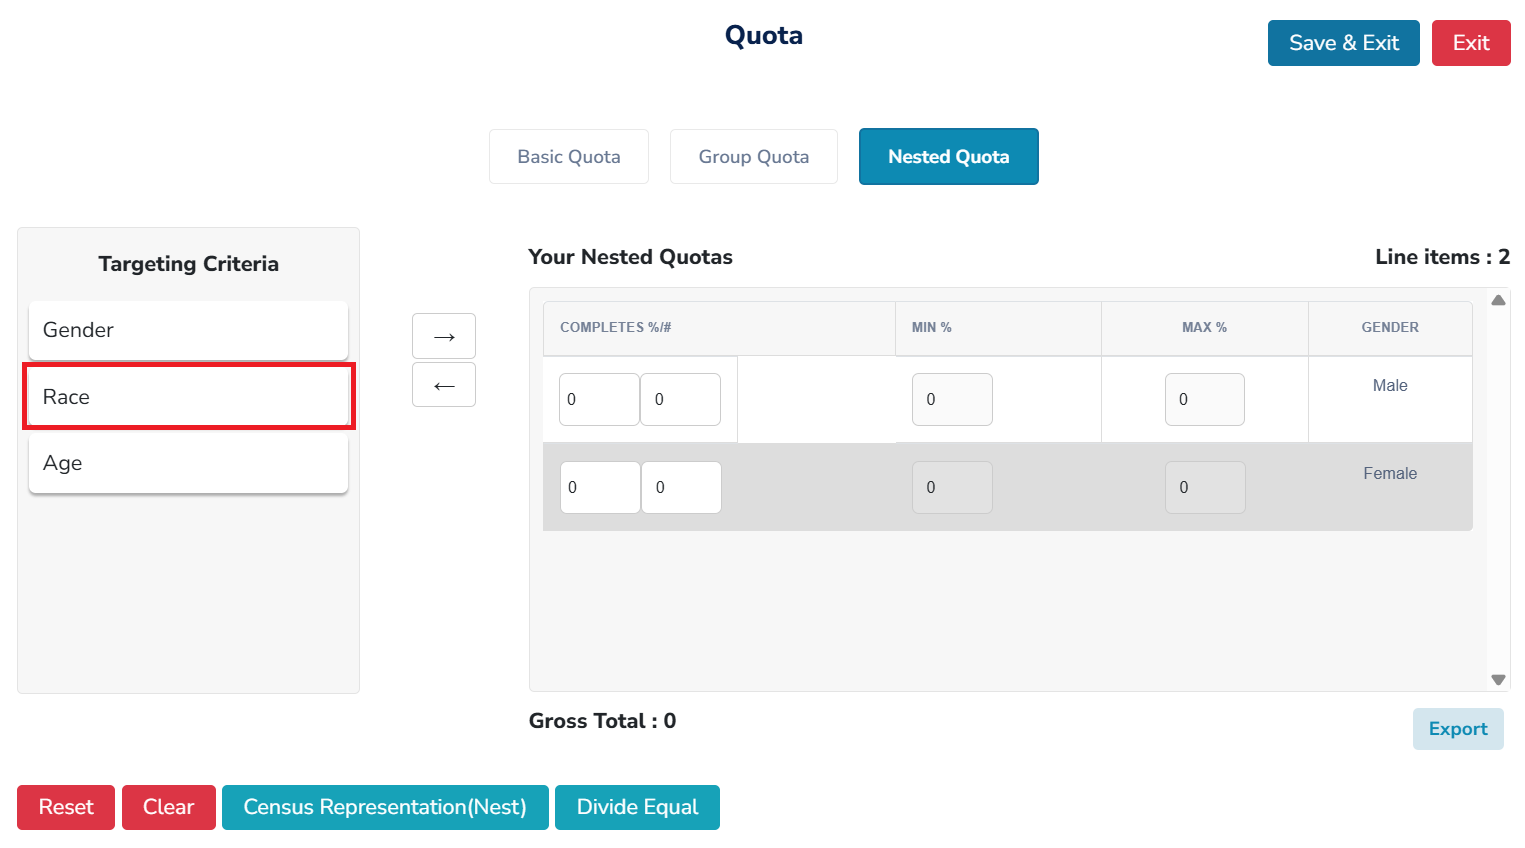
Nested Quota - Select the 'Group Quotas' tab to begin grouping option choices.
Target Criteria - Locate the qualification you would like to nest under Targeting Criteria.

Your Grouped Quotas
A. Drag and drop the qualification you would like to nest from Targeting Criteria and drop it under Your Group Quotas.
B. Select only the choices you would like to nest together. In our example below, our first target for nesting is Gender. We will be nesting both males and females. Select 'Nest' to continue.
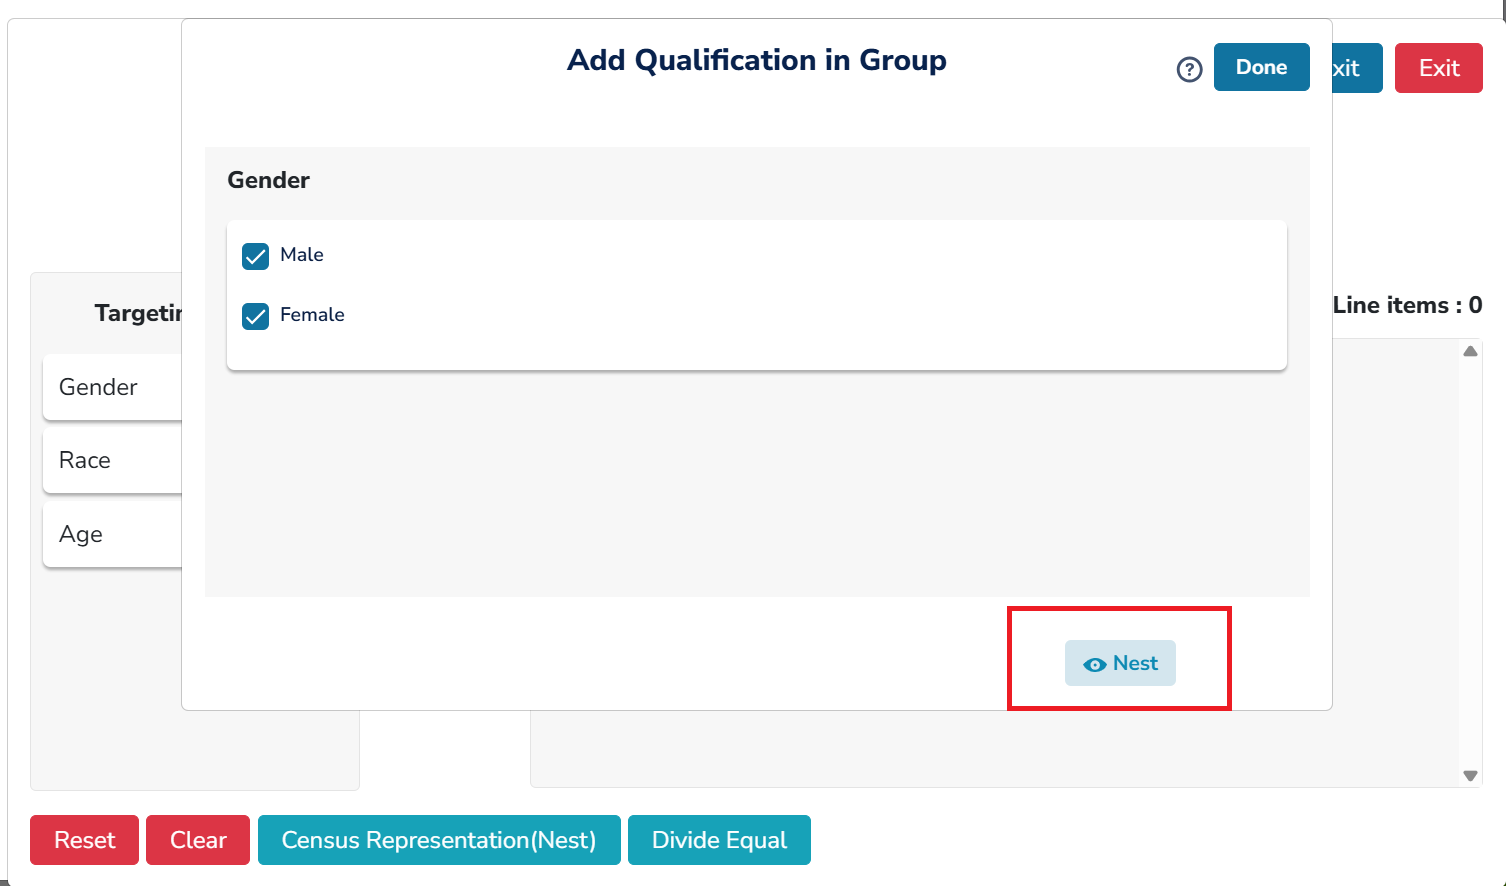
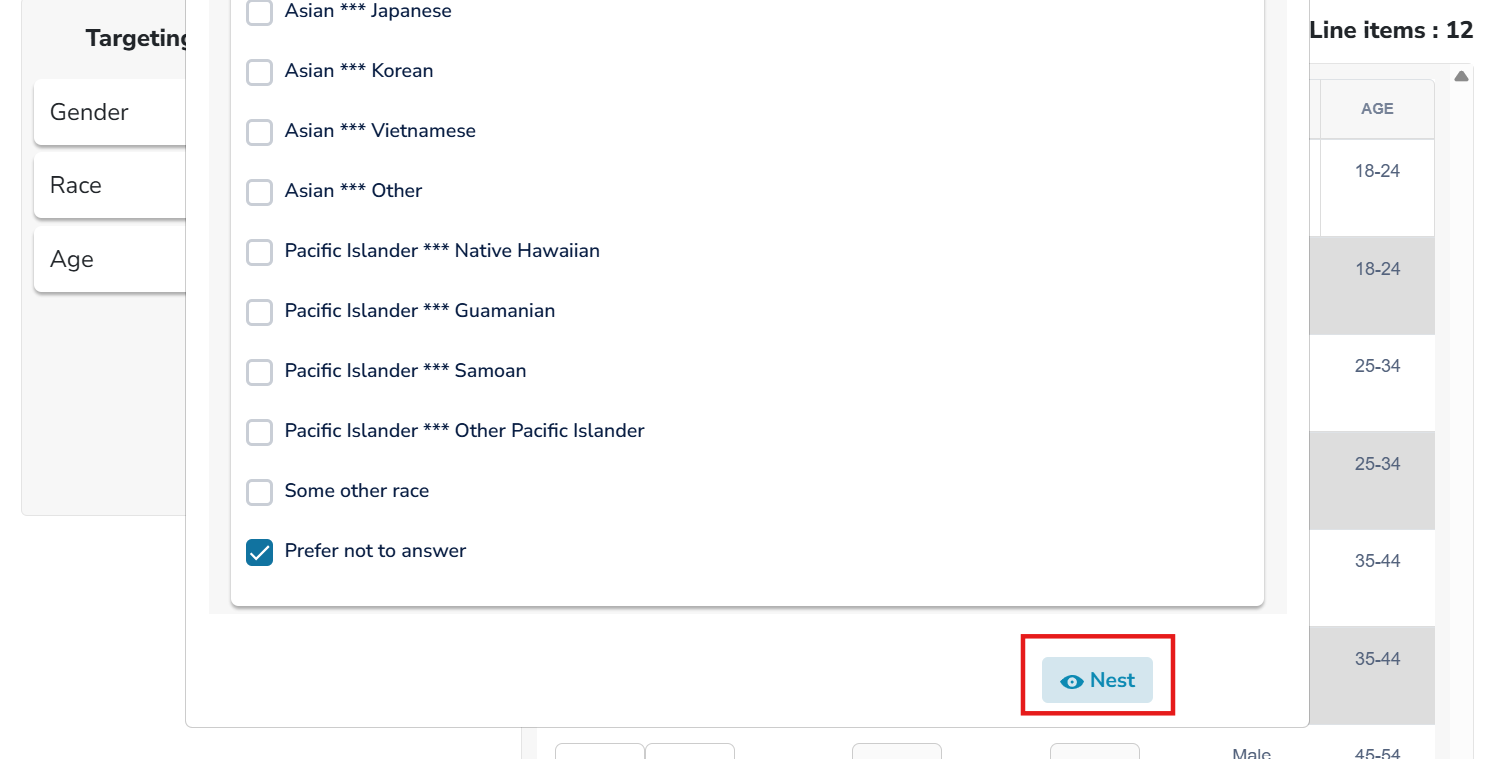
C. Drag and drop to the next target you would like to nest with your first target. Drag your second target from Targeting Criteria and drop it into Your Grouped Quotas as well.
In our example below, we are nesting Race with Gender. We have selected only 'White' as our option choice for nesting. Select 'Nest' to continue.
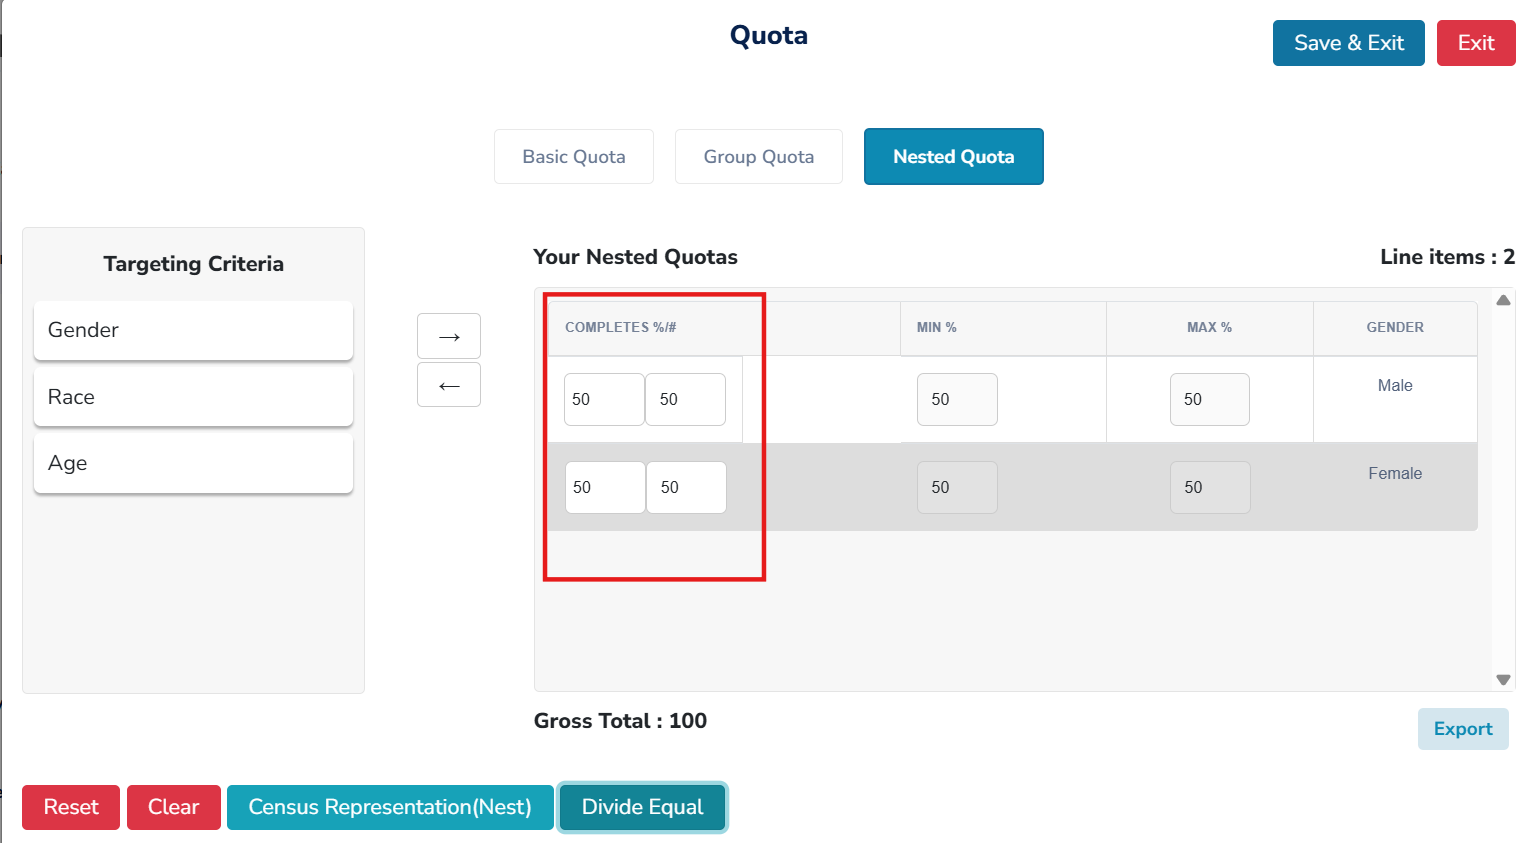
Completes % and # – Assign quotas for each of the subgroups you have created.
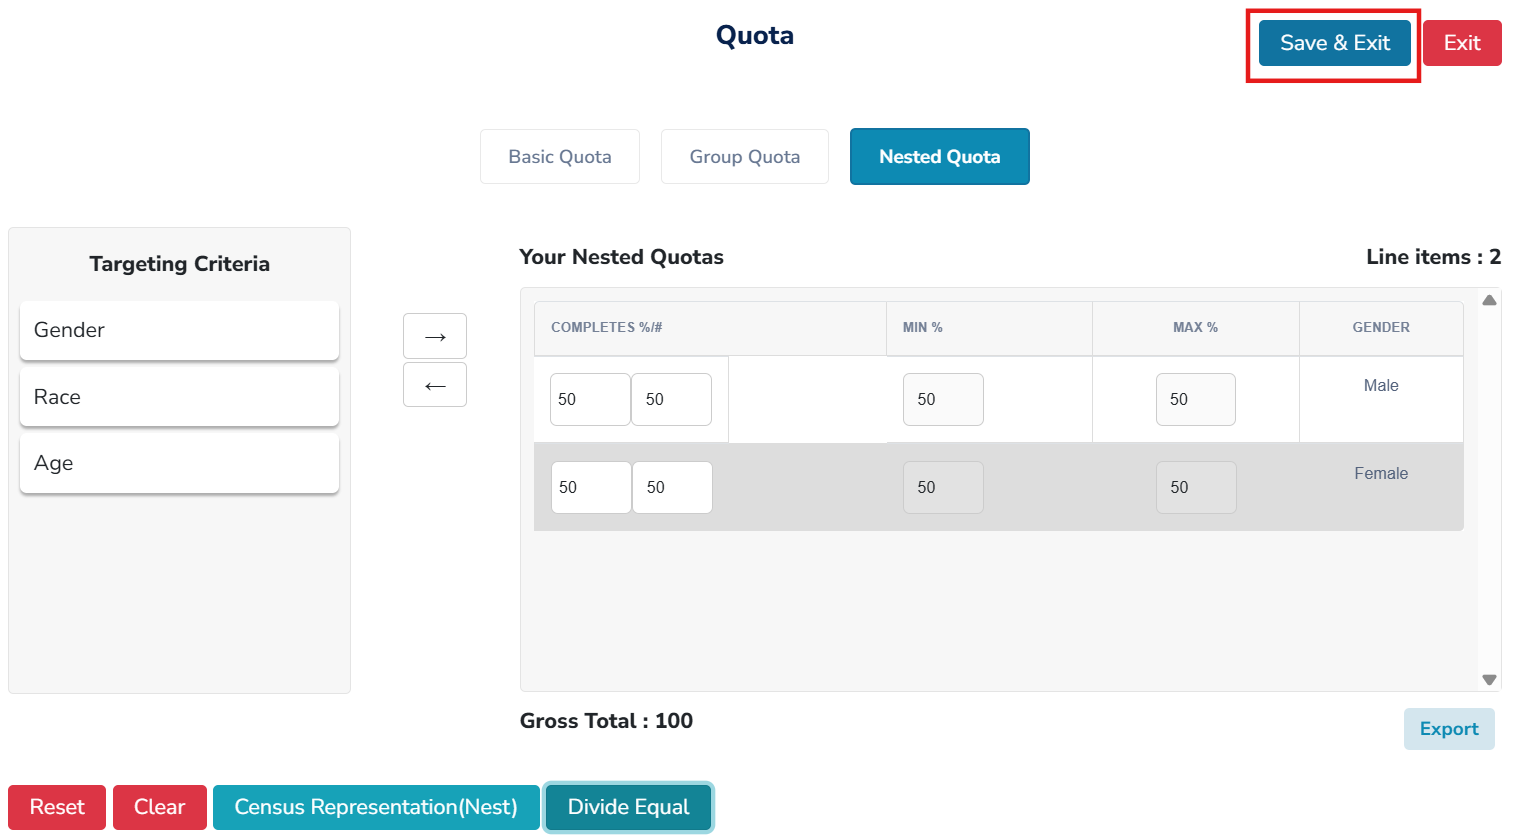
Select 'Save & Exit' to finish the nesting
Actions that can be performed for nested quotas include:
A. Divide Equal - You can divide the quotas equally among the groups.
B. Clear - You can remove all quotas, allowing you to enter them again.
C. Reset - You can delete the nested groups you just created, allowing you to start again from scratch.
D. Nest by Census - This option enables you to automatically add quotas to your qualification based on census data.
Helpful Hint: Currently, census data is only available for targets of Gender, Age, and Region.
Nested By Census
This option allows you to nest the qualifications of Gender, Age, and/or Region based on the census representation.
Helpful Hint: Currently, Zamplia only provides census allocation for Gender, Age, and/or Region.
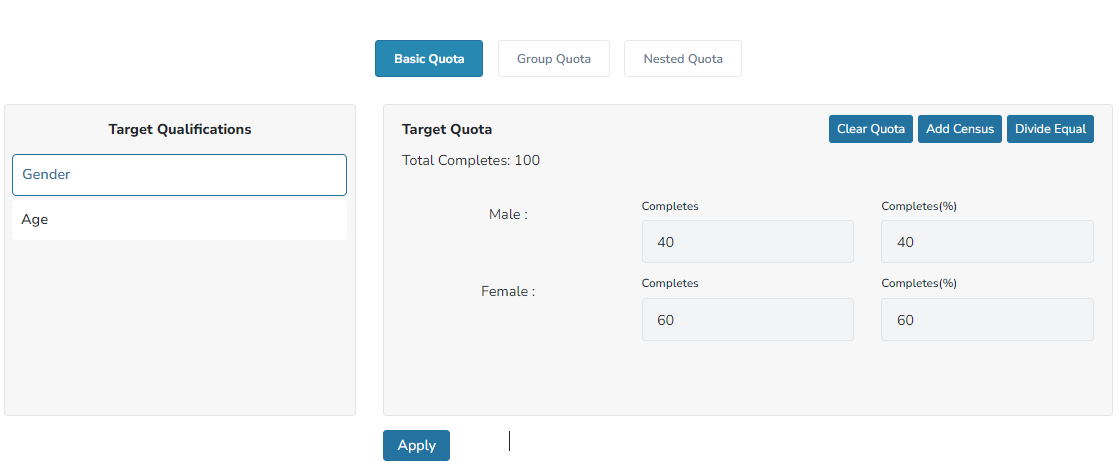
Basic Quota - To initiate your Nested by Census project, start by applying the census at the basic level to the targets. A. Select the target under Basic Quota.
B. Select Add Census to the target.
C. Select Apply to save your progress
D. Repeat steps 1A to 1C for other targets you wish to Nest by Census.
Nested Quota – Select the ‘Nested Quota' tab to begin nesting your targets.

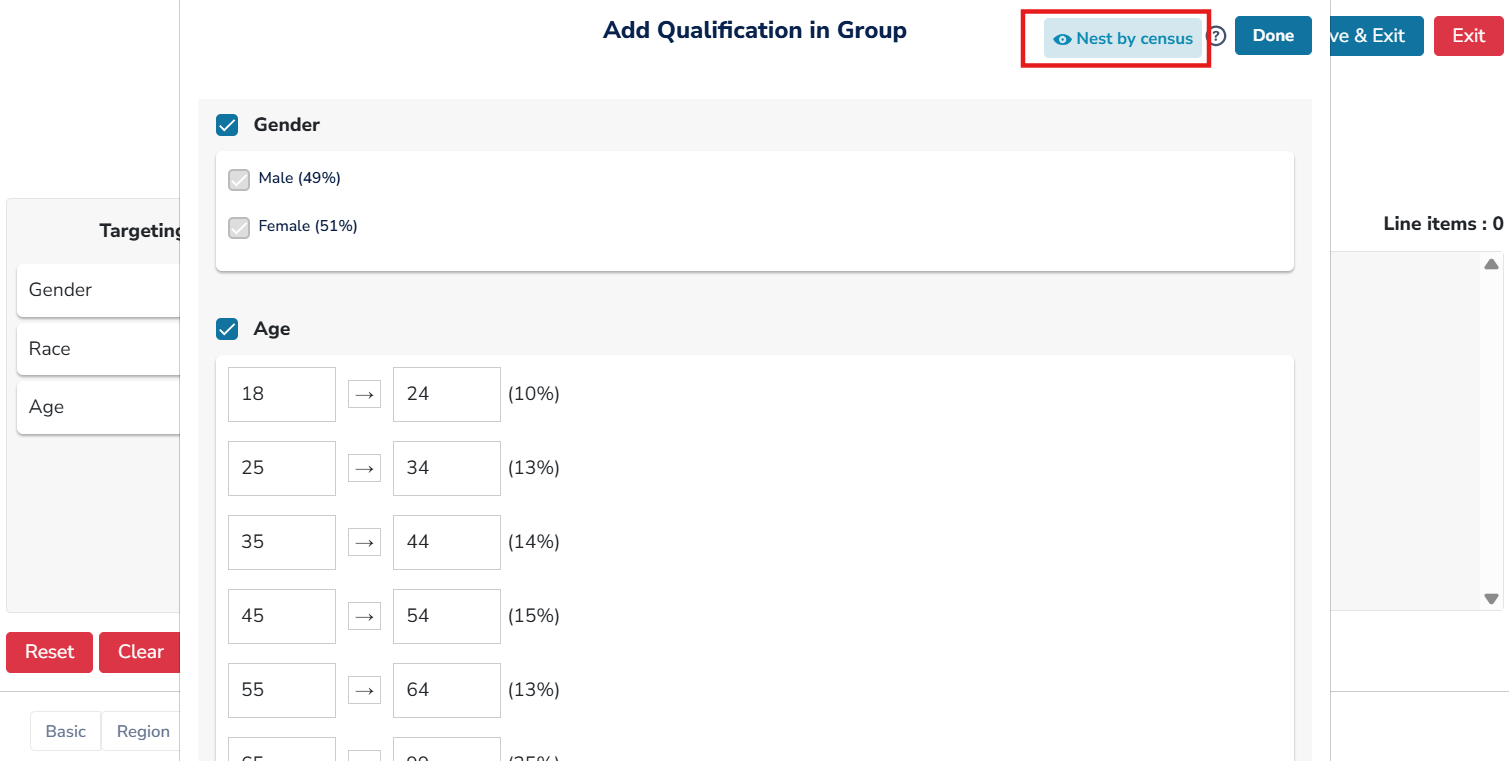
Nest by census
A. Select Nest by census.
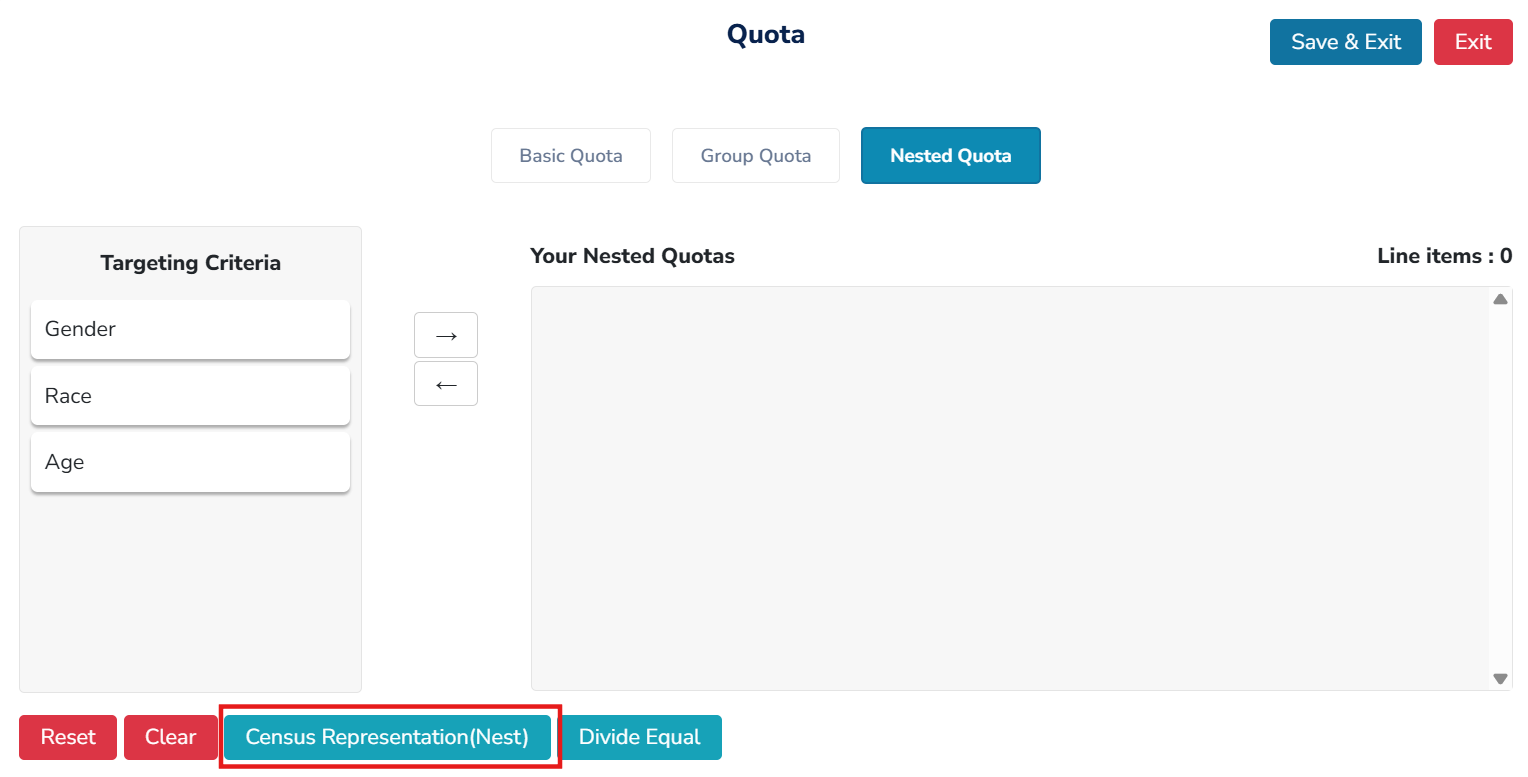
B. Then, choose the targets you want to nest for census representation by selecting the corresponding checkbox.
In this example, all three qualifications (Age and Region) are available to choose from. A checkbox can be located next to each of the qualifications.
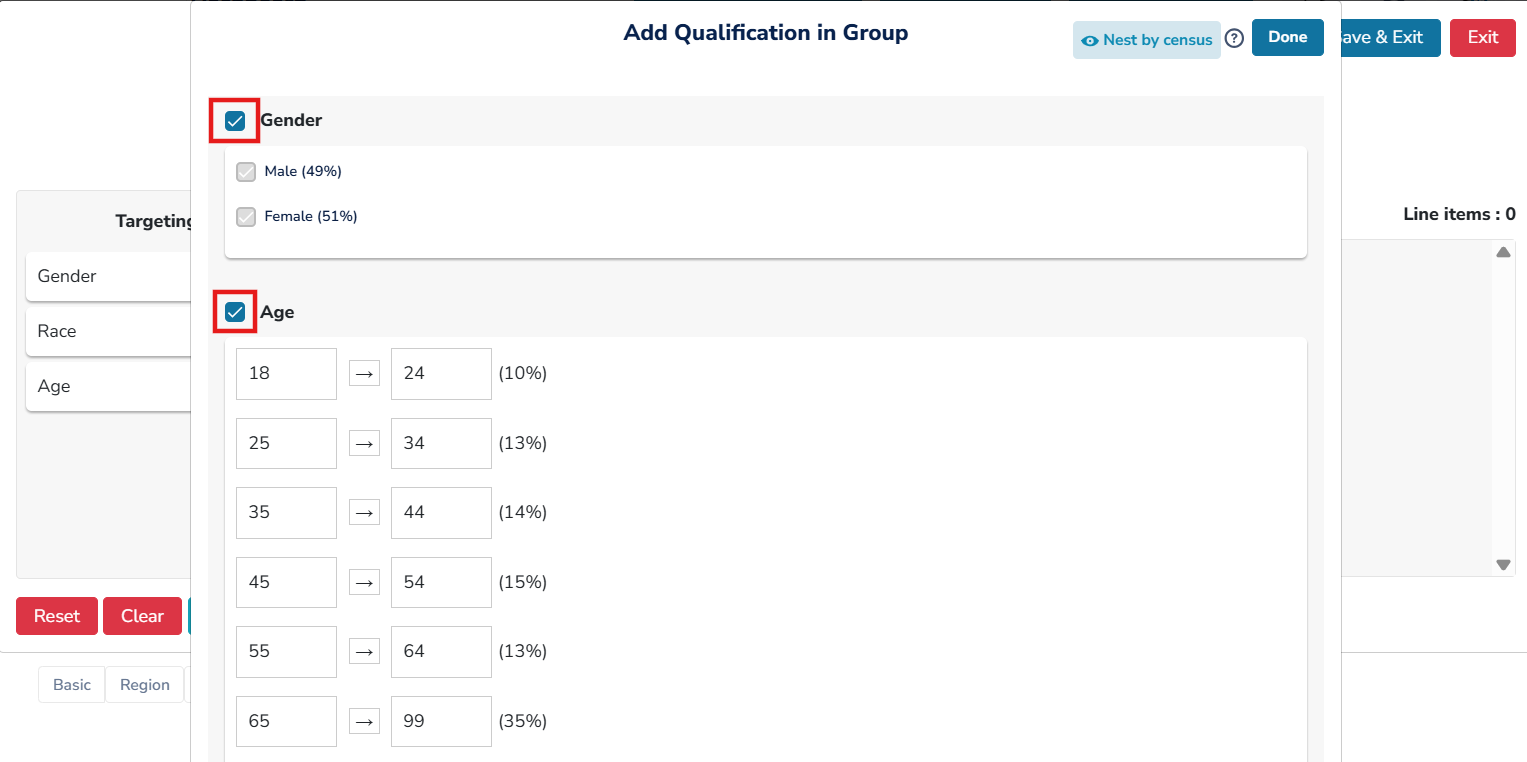
C. After deciding which qualifications you would like to nest, proceed with submitting the ’Nest by Census’ button at the bottom right corner.
Helpful Hint: Zamplia allows you to nest all three qualifications at once or any two of the three.
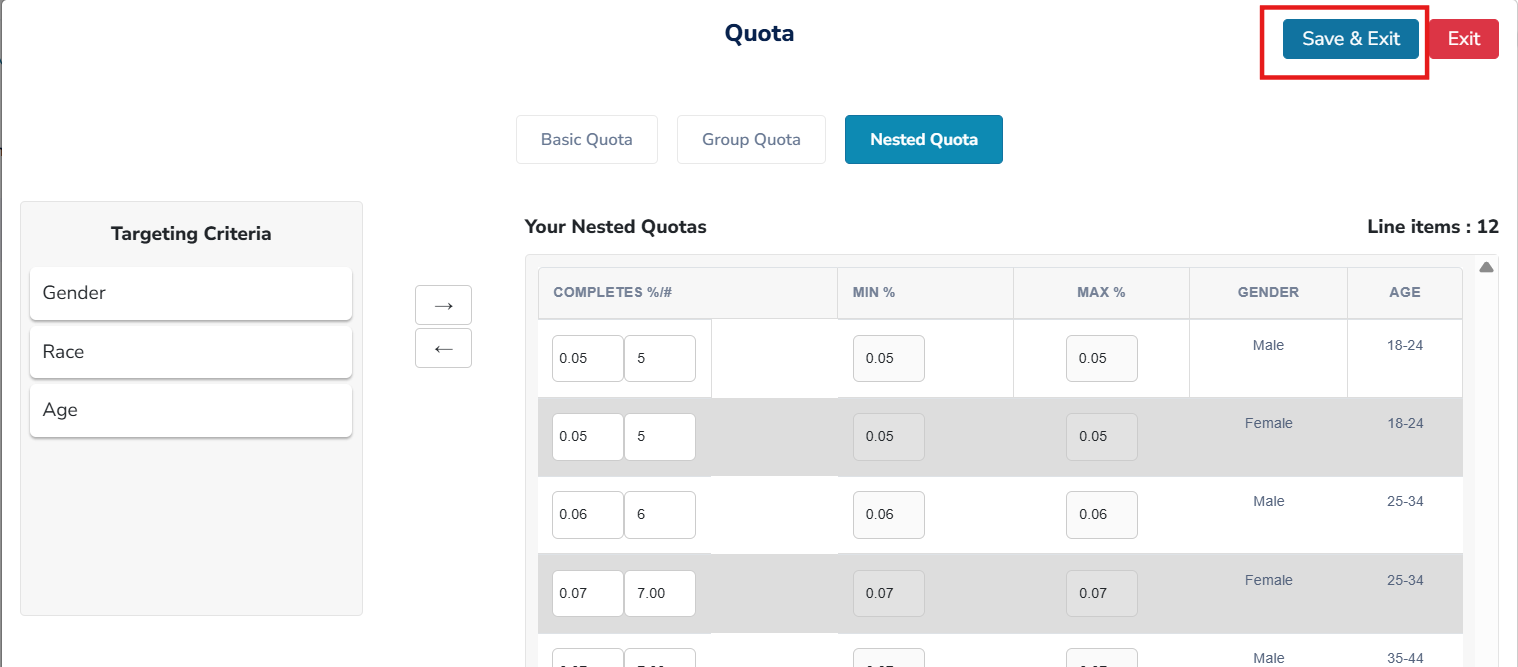
D. Zamplia will automatically nest the qualifications you selected, and the distribution displayed on the screen will be based on the census representation. Select ‘Save & Exit’ to save your progress.
Quota Updates
Updating your project's total 'n-size' will lead to an automatic update to all your existing quota setups (basic quota, group quota, and nested quota).
Our system will automatically update the quotas based on the percentage (%) of the quota splits. In scenarios where the total is not adding up, we will alert you with an 'X' symbol placed next to your quota.
In the example below, the project total was previously 100 and has been updated to 124.
Basic quota splits no longer match for Gender; therefore, an 'X' is alerted next to the qualification.
Monitoring the Quotas/Qualifications
To monitor the status of your qualifications and quotas, follow these steps:
Go to the "eye icon" on your project’s main screen.
You will see four tabs:
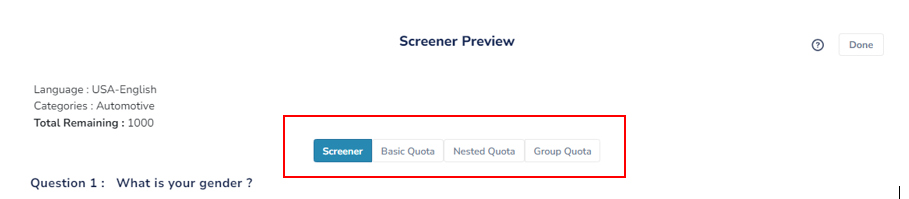
a. Screener - Displays all the selected qualifications.
b. Basic Quota - Shows the basic quotas you have added for each qualification, including the total target size, the total achieved, and the total remaining for each quota.
c. Nested Quota - Displays all the nested quotas you have created, including the total target size, the total achieved, and the total remaining for each quota group.
d. Group Quota - Displays all the group quotas you have created, including the total target size, the total achieved, and the total remaining for each quota group.
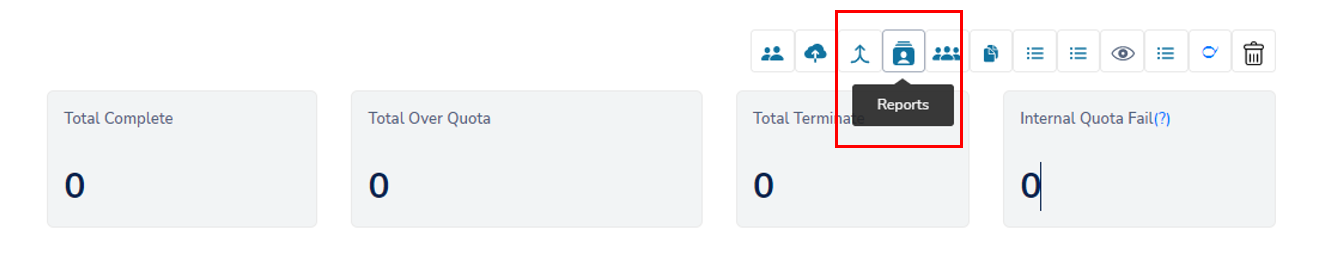
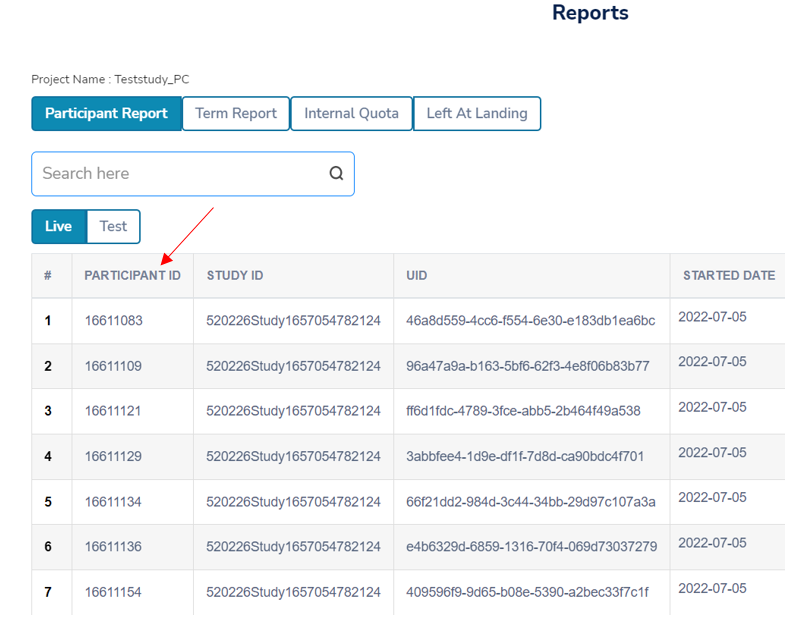
Participant Report
To monitor the status of participants who redirected back to Zamplia, you can pull the Participant Report. This report will give you information about:
● Status - The status of the respondents as captured on Zamplia.
● StartLoi - The entry time at which the respondent started your survey.
● endLOI - The exit time at which the respondent left your survey.
● Loi (Length of Interview) - The length of time in minutes that the respondent spent on your survey.
● VendorName - The vendor from which the panelist originated.
To access the Participant Report:
Select “Reports” from your project settings page
Go to the "Participant Report" section.
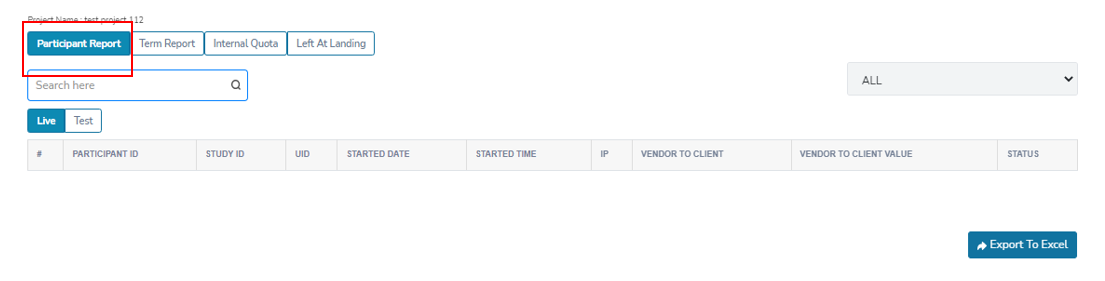
To view either test cases or live cases, switch between the "Test" and "Live" tabs.
Helpful Hint:
● The vendors' test cases can be found in the "Test" tab. These entries are used to verify if the redirects have been implemented correctly.
● The vendors' live cases, on the other hand, can be found in the "Live" tab. Once the sample is launched for the study, participants will be directed to the live links.
A. Switch to the "Test" tab to review all test cases.
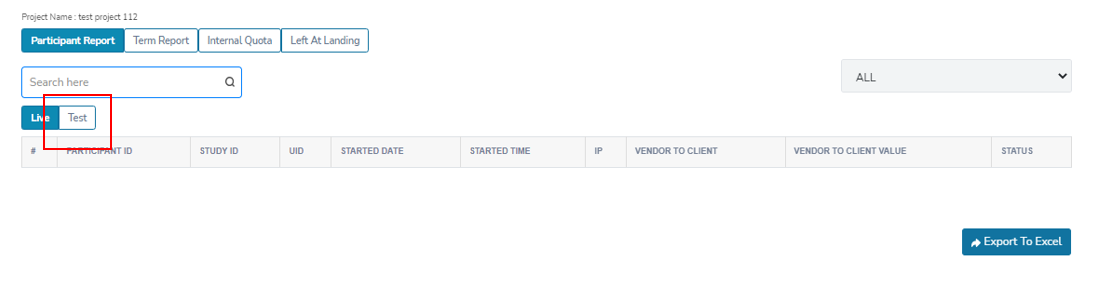
B. Switch to the “Live” tab to review all live cases.

To locate a specific case, you can type its ID into the search bar. For instance, "xxxxx4321" in the below example.

You also have the option to export the Participant Report to an Excel csv file.
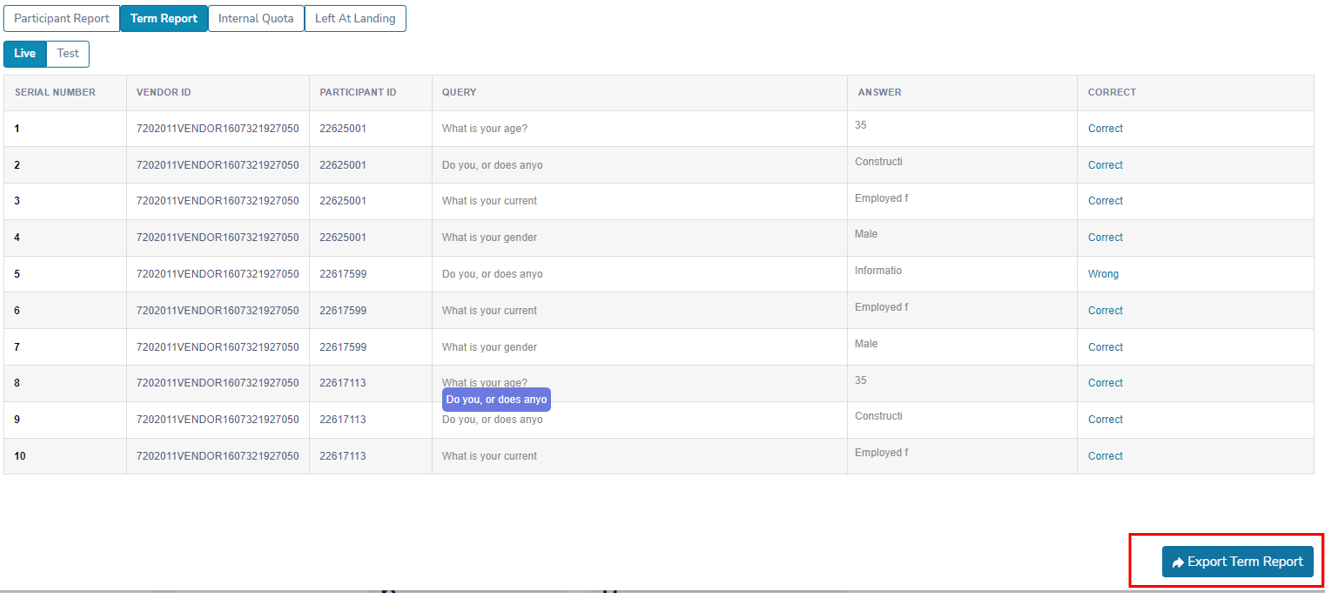
Term Report
If you need to review the screener selections made by the respondents in Zamplia, you can do so under the project's Term Report.
Through the term report you can also locate the following:
● Passed/Failed: If the panelist failed or passed the screener question.
● Wrong Question: What question the respondent last answered and screened out at.
Go to the "Reports" section on your project’s main page.
Navigate to the "Term Report" to view the responses of each participant.

Identify which cases you want to review..
Helpful Hint:
● The vendors' test cases can be found in the "Test" tab.
● The vendors' live cases, on the other hand, can be found in the "Live" tab. Once the sample is launched for the study, participants will be directed to the live links.
A. Switch to the "Test" tab to review all test cases.

B. Switch to the “Live” tab to review all live cases.

You also have the option to export the Term Report to an Excel csv file.
Testing Your Survey Redirect
Before launching a study, it is important to test the setup to ensure that the redirects have been implemented correctly and that the participant IDs are captured successfully on Zamplia.
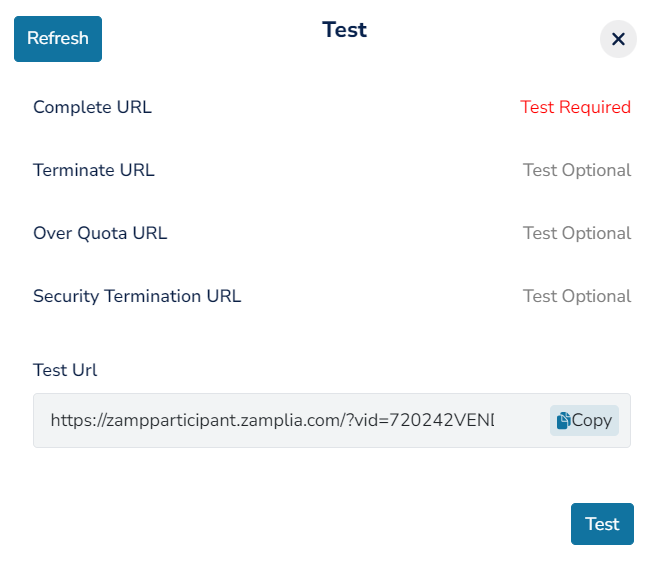
Click into this ‘Test’ icon located on your main project screen.
From the new popped-up window, to test, you can either directly hit on the Test button located at bottom right, or, you can copy and paste the Test URL in a separate tab (of your more preferable browser).
You’ll be taken through Zamplia’s screener pages first. Answer all of them correctly so that you can enter your survey. Test for a Complete and a Terminate in your survey to ensure that the participant is being redirected from the client's survey to Zamplia's end link.
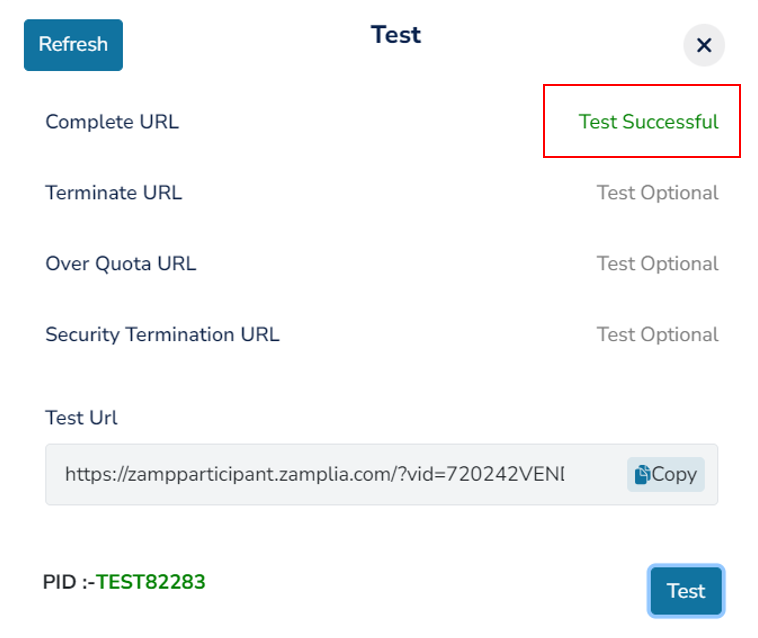
If the redirection happens perfectly and Zamplia’s participant ID is passed back in the end link properly, this is the page you’ll eventually land on –
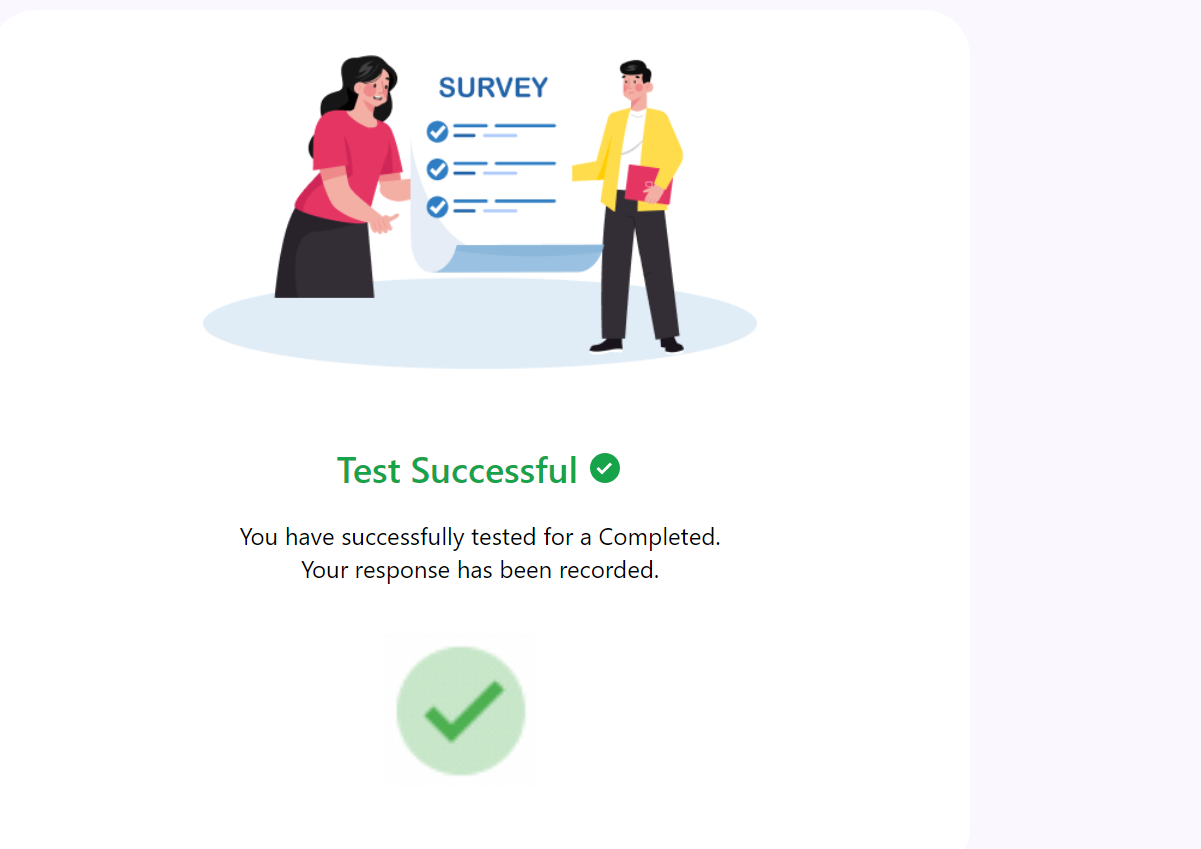
If this is not the page you land on, something must be wrong with the way Zamplia’s end links are implemented.
To double confirm and to check the capture of the ID on Zamplia in the appropriate status, please come back to the Test window on Zamplia and click on the ‘Refresh’ button.
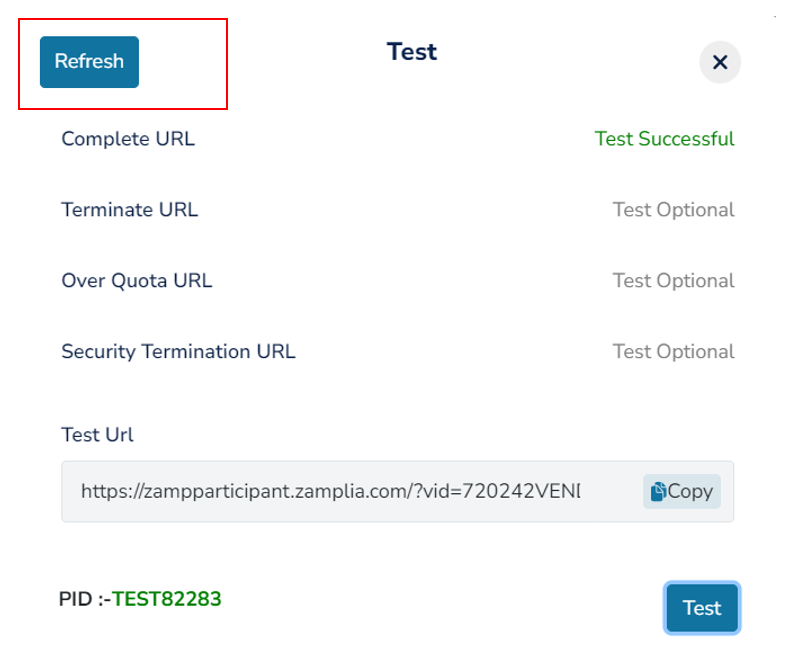
If everything happened as it should and there’s no issue with redirection, after refreshing you’ll notice the following -
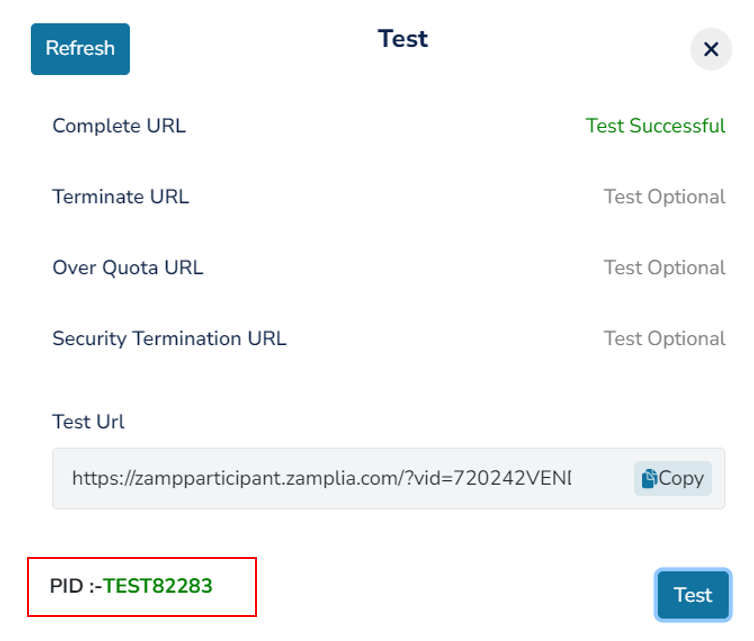
A. The test ID appearing after a PID field at the bottom left part of the window. You can even cross verify if you see the same ID recorded on the client’s end.
B. ‘Test Successful’ indication next to the status you tested for. Example – see how it shows ‘Test Successful’ in green next to ‘Complete’. If in case there was an issue with the redirection, neither would it turn green, nor would it give the ‘Test Successful’ indication.
C. When you’ll hover over the test ID, you’ll see it’s status popping up. If you see the appropriate status popping up, your test was successful. If you see ‘In Progress’ popping up instead of the appropriate status, there’s an issue with redirection and your test wasn’t successful.

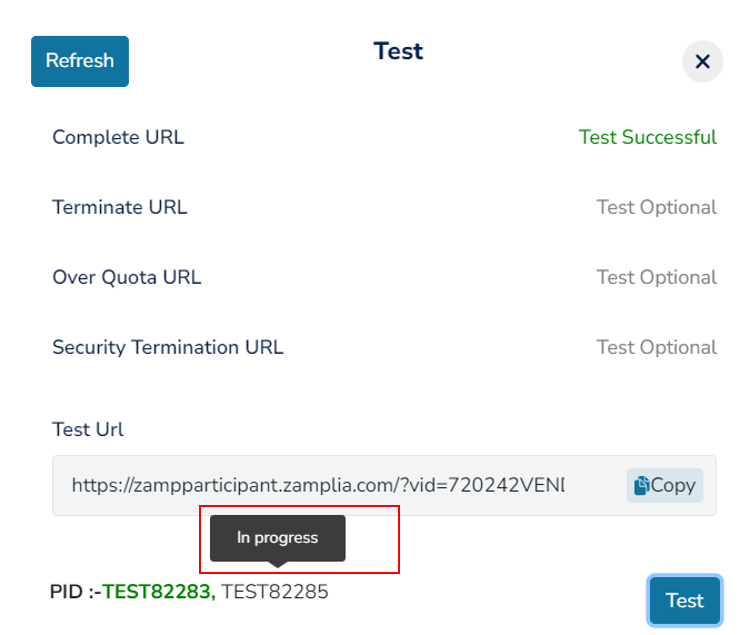
If the redirect is not correct, check the survey and the implementation of Zamplia's redirects again.
Disengage
- Vendor - Access the vendor list from the project main page.
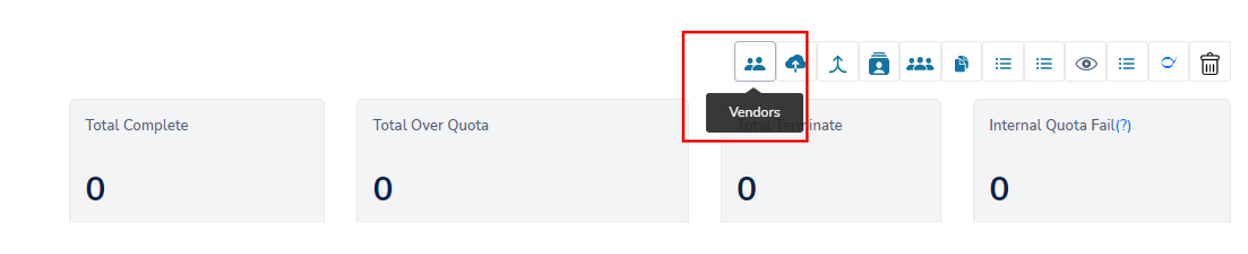
- Delete - Click on the “Delete” button located next to the vendor.
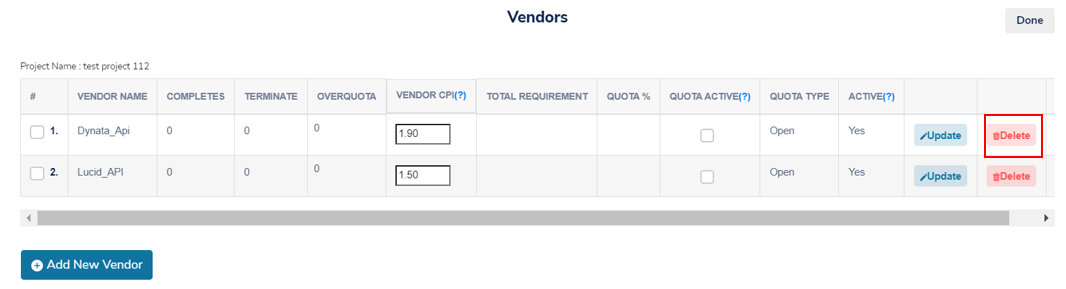
- The vendor will be immediately disengaged.
Re-engaging
Vendor - Access the vendor list from the project main page.
Update - Locate the “Update” button next to the vendor you want to activate.

Enable Mapping - A pop-up window will appear for the selected vendor. Click "Enable mapping."

The vendor will be immediately reactivated.
Creating Clones
- Clone - Locate the “Clone” button on the parent project that you want to duplicate.

Number of Clones - Enter the numbers of clones you want to create, then select “Create” to finalize. For example, if you want two additional copies of your current project, enter "2".
Name - Give each clone a unique name to distinguish them.
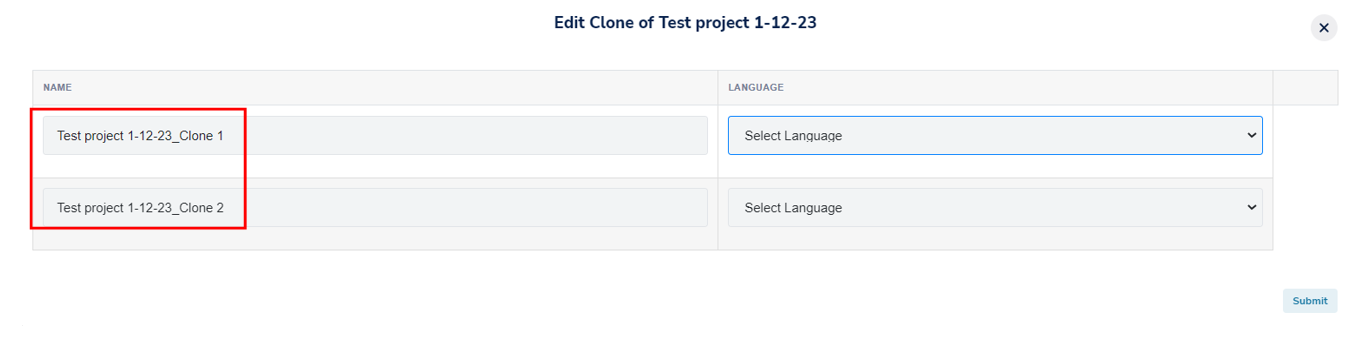
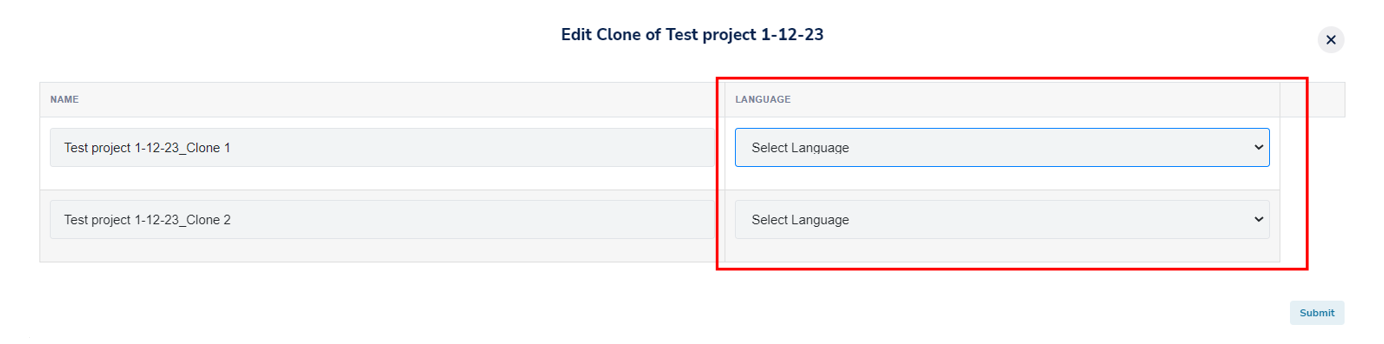
Language - Select the Language you need each clone to be in.
Enter the new URL if required.
A. Static Link - IIf your parent study used a static link, you will be prompted to provide a static link for each of the clones.
B. Pinned Link - If your parent study utilized unique links, you will also need to set up unique links for each of the clones. Click here to learn more about implementing pinned/unique links in Zamplia.
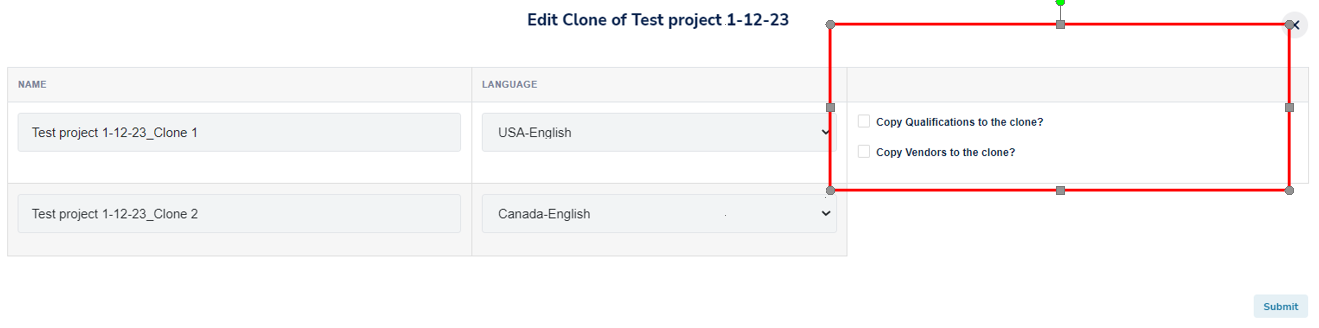
Qualification and Vendors - Choose the qualifications and vendors you want for each of the clones.
A. Same Region as Parent Project - If the clone is in the same region as the parent study, you have the option to copy over the same qualification and vendor settings from the parent study.
B. Different Region as Parent Project - If the clone is in a different region than the parent study, you will need to select the target audience for the clone through the Project (API).
Submit - Select submit, and you will be taken to the Clone list for the project.
Clone List - Select the clone that you want to edit from your clone list.
Project (API) - Once you enter your clone’s project page, select “Project (API).”
Select the qualifications and vendors you want to use for the specific clone.
Update Project - Update Project to apply the selected settings to the clone.
Launch - If you are satisfied with the setup of the clone, change the project status from "On Hold" to "Live" to start the clone.
First Method
- Search your clones up by name from the “Projects” tab.
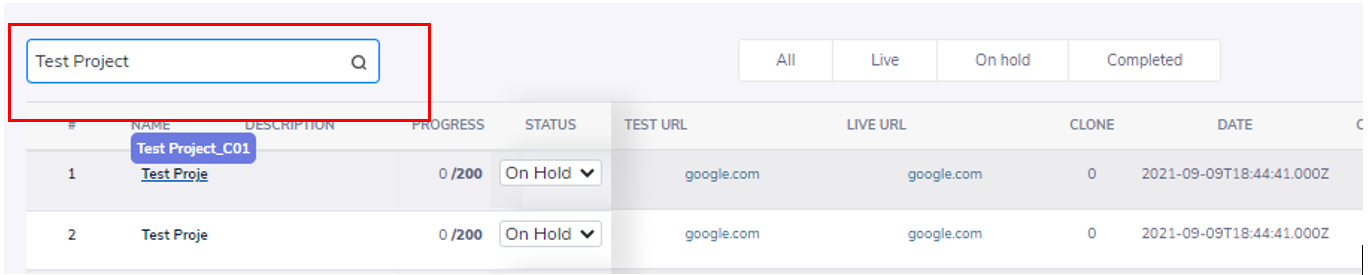
- Search your clones up by name from the “Projects” tab.
Second Method
Access the clones from the parent project’s main page.
Locate the Clone List icon on the main page of your parent project.
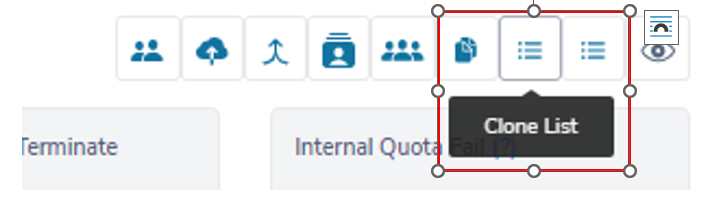
Select the icon to be taken to the list of clones.

Third Method
Access your clones by selecting them from the Projects tab.
Locate the parent survey.
Select the clones next to the project name.
The clone column will list how many clones were made.
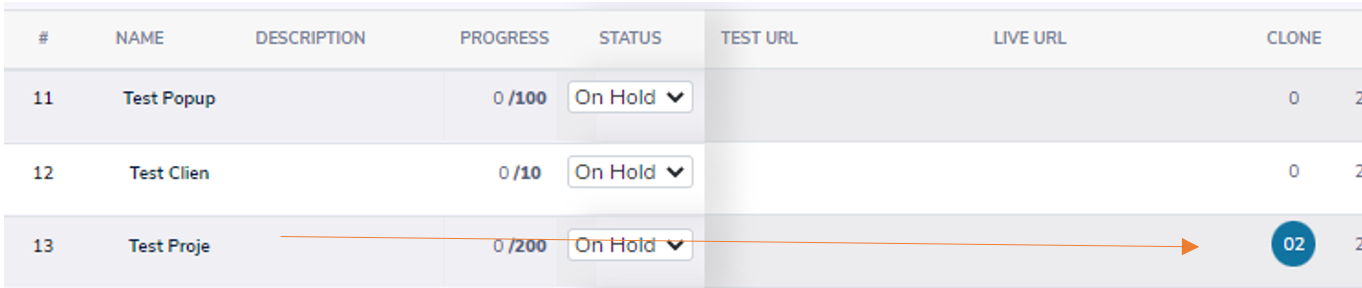
After selecting the clone icon, you will be redirected to the clone list.

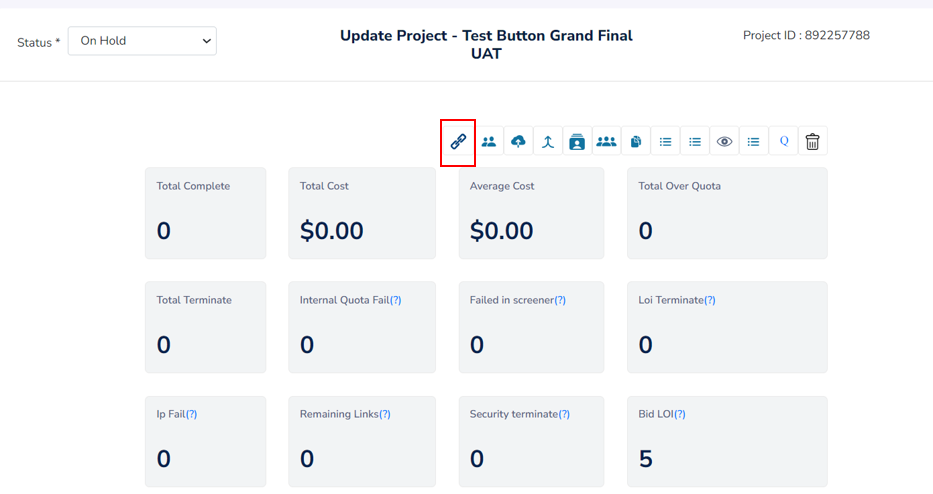
Redirecting back to Zamplia
After the respondent is finished taking the survey, you must redirect them from your survey to our landing page. It’s important to include our variable, UID, and appropriate status.
Listed below the Returned URLs for Zamplia:
Complete: https://zampcomplete.zamplia.com/?UID=xxxx
Terminate: https://zampterminate.zamplia.com/?UID=xxxx
Quota full: https://zampquotafail.zamplia.com/?UID=xxxx
Security Termination: https://zampsecurityfail.zamplia.com/?UID=xxx
Static Links
In the context of a survey, a static link is a permanent URL that is used to access a particular survey. The respondents can access the survey by visiting the static link. The link remains the same for all respondents, regardless of how many times the survey is taken or how the content of the survey is updated.
Please be sure to enter our redirect links before launching a study. Our end links can be found here.
If you are inputting a static link for your project, please be sure to have UID programmed as the variable.
Input <pid> as your placeholder.
E.g. If you are inputting the following link:
https://survey.logitgroup.com/SE/1/388333?urlimport=1&QUESTLIST=UID
You will be updating the link to include “&UID=<pid>”
https://survey.logitgroup.com/SE/1/388333?urlimport=1&QUESTLIST=UID &UID=<pid>
Zamplia will then pipe in a unique panelist ID to fill in for <pid>
Pinned Links
Pinned links are unique URLs that are generated for individual respondents. Each respondent is given a unique link that is specific to them, allowing the survey administrator to track their responses and ensure that the survey is only taken once by each individual. Pinned links are often used in market research studies where it is important to track the responses of specific individuals and ensure the accuracy of the data collected. They can also be used to ensure that a survey is only taken by the intended target audience.
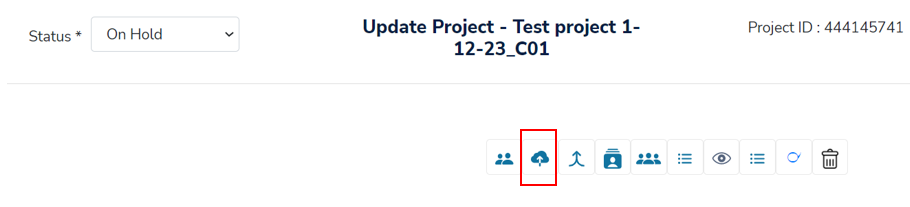
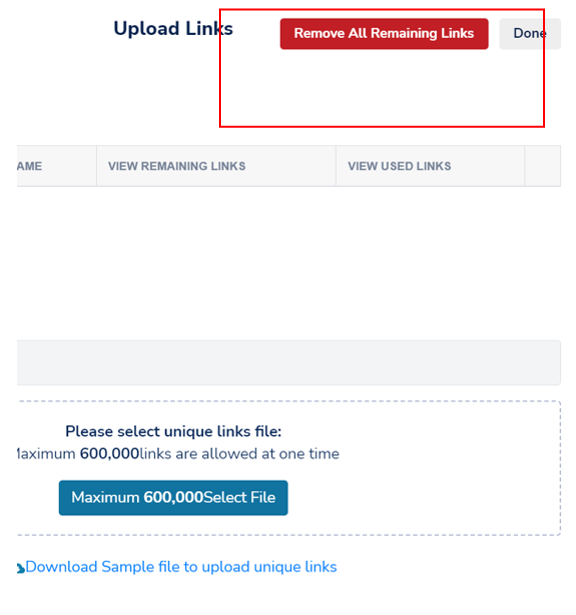
If you've selected the 'Pinned Links' option while creating the project, pinned links should be prompted automatically upon creation. However, if you are not prompted, you can still upload them by selecting the "Upload Links" tab located on the project’s main page.
Zamplia will automatically append "&UID=<pid>" to your unique entry URL.
Helpful Hint: It's important to note that you can update the variable if needed, but be sure to keep the placeholder the same for the redirect to function properly.
For example, if your survey hosting platform requires "&RID=<pid>", you can update accordingly.

Please note that Live URLs and Test URLs must be uploaded separately. Toggle to the appropriate tab before uploading.
In the example below, we're selecting Live URLs, so the uploaded URLs will only be used for live cases.
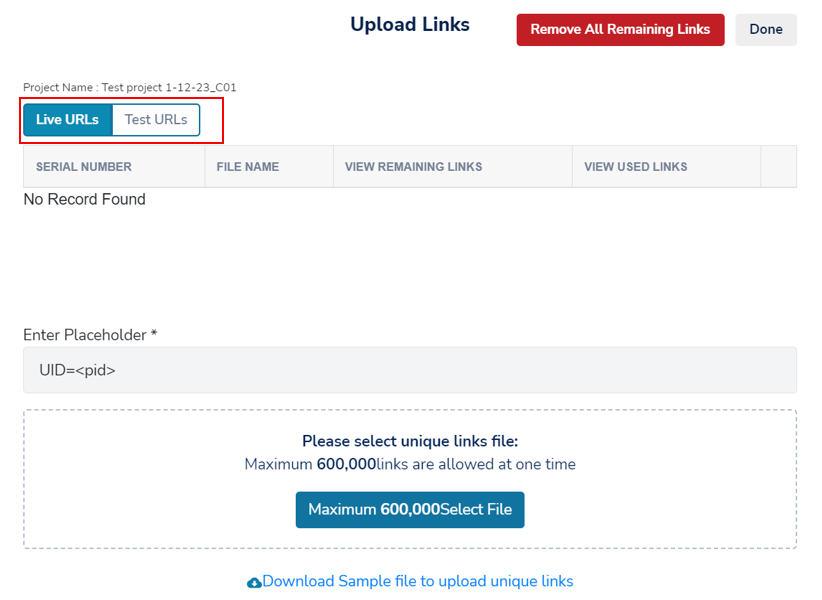
Upload your pinned links in a .csv file with one URL per line, without any header.
In case you need to remove the links, you can do so by clicking on the "Remove all Remaining Links" button.
Screeners
It allows you to view all the available targetable qualifications in Zamplia.
You can also add, remove, and view custom screeners.
Additionally, you can search for screeners in the qualifications list.
Custom Screeners
These are custom pre-screening questions that you can create on the platform for your projects. Unlike targetable qualifications, these questions are not used to profile panelists, but rather to screen them out from taking your survey. They can be used for purposes such as adding red herring questions to your studies. Custom screeners enable you to screen participants before they start your main survey..
On the "Create Project" or "Project (API)," you will find "Custom" as one of the options for targets.
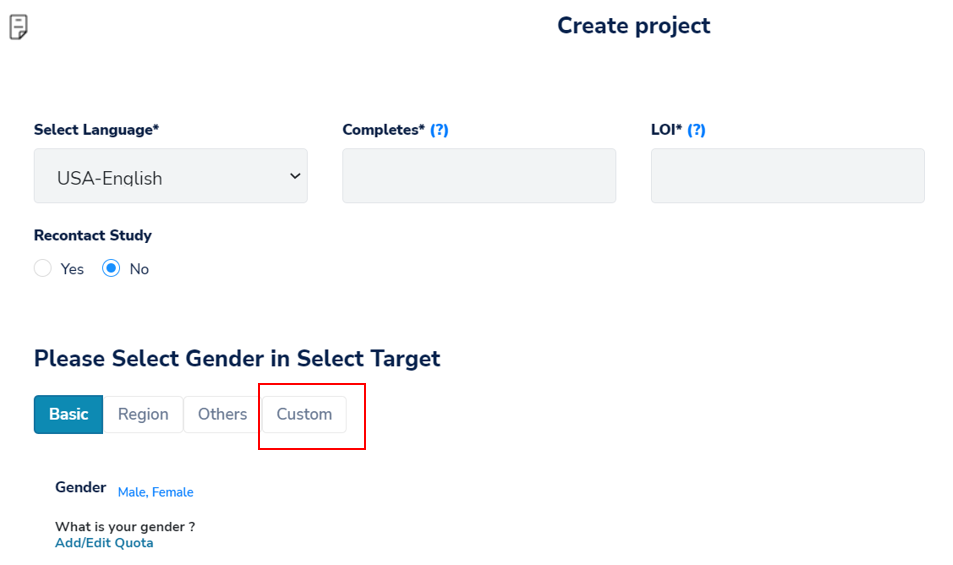
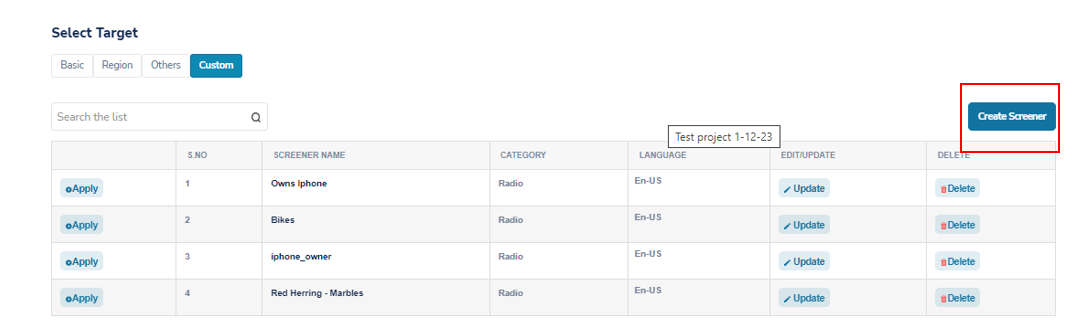
To create a custom screener, select "Create Screener."
Screener Question Name - Give a name to your screener, then select “Create Screener” to continue. In our example, our screener name is “User’s primary phone brand”

Fill in the additional information for your question:
A. Question Language - Choose the region and language for your question.
Helpful Hint: Ensure that your custom screener is set in the same country-language as the project it will be enabled on. For instance, if your study is in US-English, set the custom screener in US-English as well.
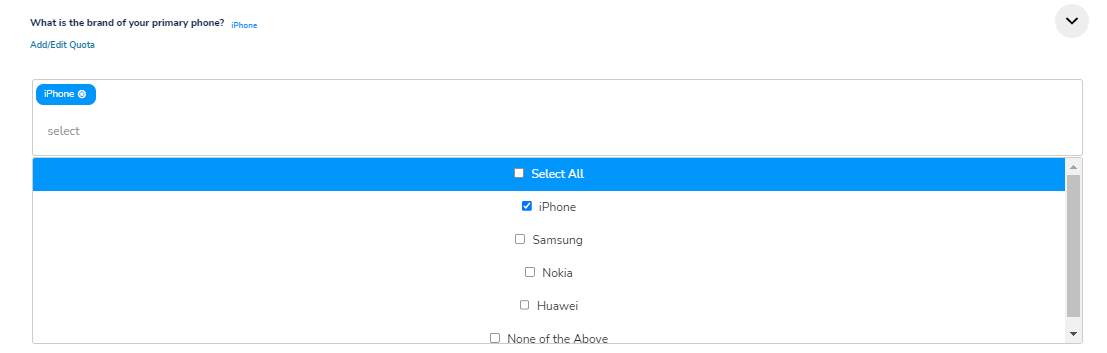
B. Question Text - Enter the question you want to ask your participants. For example, our question was "What is the brand of your primary phone?"
C. Question Type - Choose the type of question you want your question to be. In our example, we used the Radio option.

➔ Drop-Down List option allows you to add a question with a drop-down list for the choices.
➔ Multi-Select option allows you to create a question where the respondent can select multiple answers.
➔ Radio option allows the respondent to choose only one option from a list.
➔ Range option enables you to set a range of numbers.
➔ Text option requires the respondent to enter a specific answer in a text box to proceed.
➔ Open Ended option provides the respondent with a text box to enter any answer and it's only recorded, not used for screening.
Select “Add Question” to continue.
A. Drop-Down List, Multi-Select, Radio or Range - To create a list of options for respondents to choose from, you need to select "Add" under the "Add Option" column.

Option Text - A new window will pop up where you can type your option into the textbox labeled ‘Option Text’. Select “Add Option “ to input it.
A. One at a time - You can continue adding options one by one using the same method. Add one option, click on the "Add Option" button, add another option and keep repeating until you have added all your options.
B. All at once - Another method would be adding in all your options at once using the delimiter ##$$##.
For example, I would like my options to be "Yes", "No", and "Prefer Not to Answer" for my question. To add these options simultaneously, I will input "Yes##$$##No##$$##Prefer Not to Answer" then select Add Options.


Once your options are added, simply click on “Done” and you’ll be taken to the “Custom” tab.
Your newly created custom screener will now appear in the custom screener list. You can search for it in the list, and once you've located it, click "Apply" to add it to your survey.
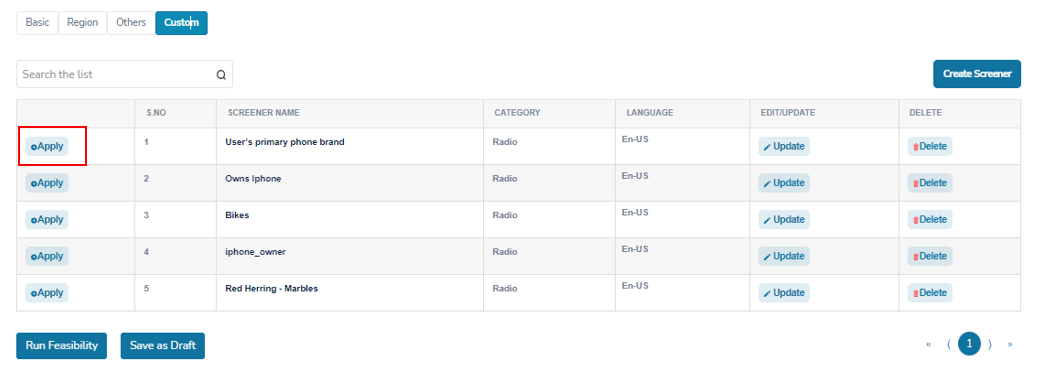
Select the options that will qualify for your custom screener. In my example, only "iPhone" is the qualifying answer.
Updating Your Project
To update your qualifications, specifications, quotas and/or list of vendors, locate the “Project API” option from your project main screen. The process is similar to creating a project, with the only difference being that you are now making updates. It's that simple!
Zamplia Fielding Advice
Do you need to get more movement going for your study? Please review our advice listed below.
Advice 1: Targeting a Niche Group
If you need to target a specific group and get your project out in the field quickly, consider selecting as many vendors as possible for your project. The larger the sample pool, the more effective your project will be.
Advice 2: Disabling Vendor Quotas
To increase the sample size in your project, disabling the vendors' allocated quotas is a good option.
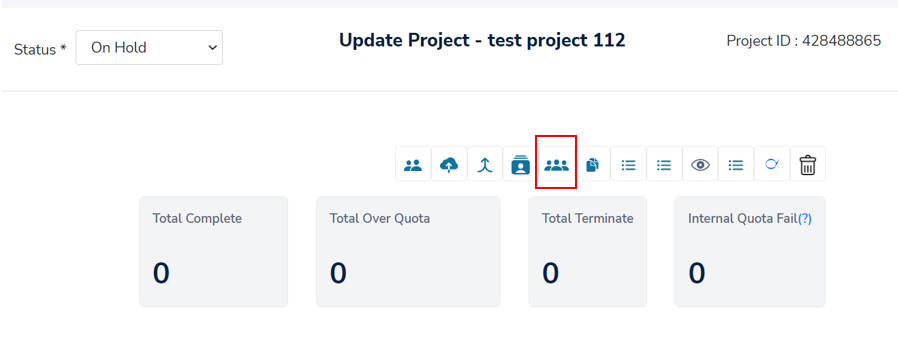
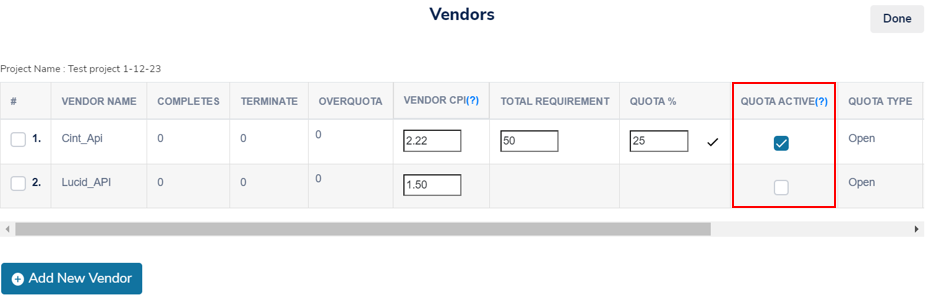
To edit vendors allocated quotas, you need to enter into the vendors list from the project’s main screen.

Once entered, you’ll be able to disable their allocated quotas by unchecking the “Quota Active” option.
Advice 3: Revising Project Specs
If your project is not fielding as expected, revising the specs and cost can help prioritize your project and increase the sample size.
A. Revising by Vendor
If some vendors are off-spec in comparison to the overall health of the study, Zamplia will alert you through the Bell icon. Approve any revised cost to get that vendor back on track.
![]()
B. Revising Overall Project Specs
If the entire project is off-spec, update the Incidence/LOI through the Project API, re-run feasibility, and approve the new CPIs for your vendors.
C. Increasing a Vendor's CPI
If movement has not started, been suppressed, or is slow, you can manually increase the vendor's CPI.
📋 How to increase a single Vendor's CPI
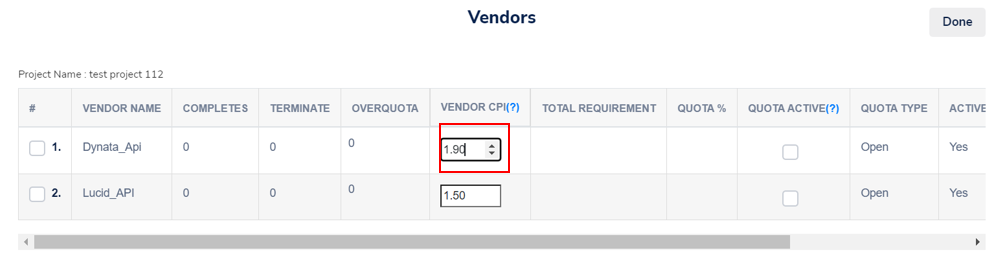
Navigate to your project’s main page and locate the vendor list.
Increase the desired vendor’s CPI directly from this list.
💡 Increasing multiple Vendors' CPI at once
You can update and inflate the CPI for multiple vendors to receive faster and higher-quality samples.
🛠️ Process for Updating CPI
1️⃣ Open your project

2️⃣ Go to the Vendor tab

3️⃣ Update the CPI
Edit the vendor CPI in the designated field.

4️⃣ Click "Update All"
After updating all vendors, click Update All to apply the changes.

✅ You have now successfully updated the vendor CPI!
D. Cloning the Study
If the vendors have shut off sample due to the poor health of your study, cloning the study with realistic in-field IR/LOI can help.
Reach out to our support team for help with selecting the right qualifications for targeting.
Helpful Hint: Adding Group Security
When cloning a study, be sure to add group security to prevent respondents from entering the survey twice. Our support team can assist with this.
Advice 4: Seeking Additional Help
If you need further assistance with sampling, feel free to reach out to Zamplia's support team. We have other panel partners who may be able to help meet your remaining needs.
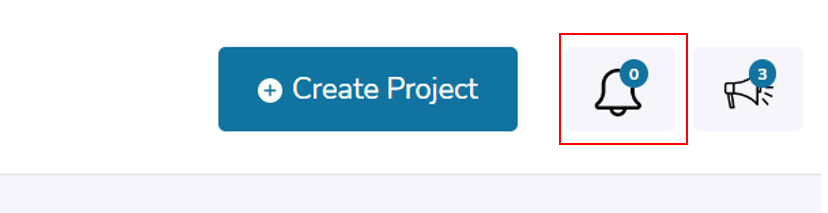
Bell Icon
Located at the top right corner of your screen is an alert that displays all dynamic pricing updates you might receive from the vendors you are working with on your projects.
If the field IR/LOI does not match the bid IR/LOI, the vendors may de-prioritize or pause the study. To improve traffic or restart it, you need to "approve" the suggested revised cost. If your budget does not allow for the cost, you have the option to "reject" it as well.
Announcement Icon
Any new features or updates on Zamplia will be announced in the "Announcement" tab, located at the top right of your Zamplia page.
![]()
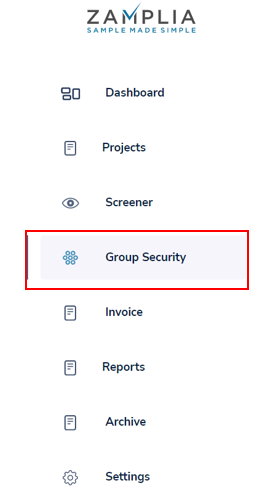
Group Security Check
Group Security Check is a feature that helps to eliminate duplicate responses in your surveys. By adding this security check, you can prevent the same respondents from entering multiple surveys on Zamplia.
1. Live Studies
- Select Group Security.
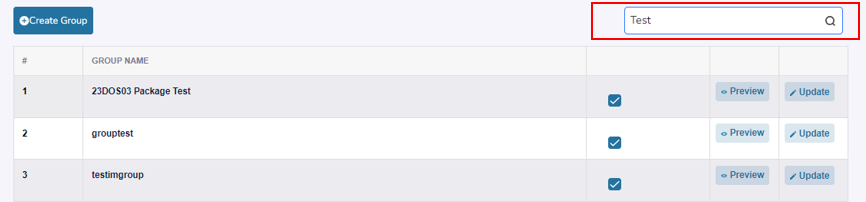
Click Create Group.
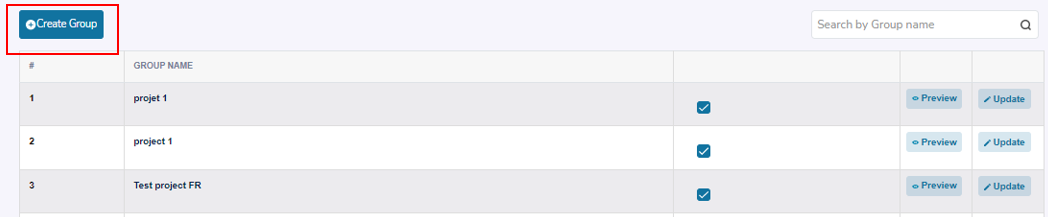
Enter the name of your group and hit "Create" when you're ready.

Apply the Group Name to the studies you need to deduplicate against. A. Create Project - You can add group security during the creation of your project.

B. Project Screen - You can also add group security to an existing project on the project's main page.
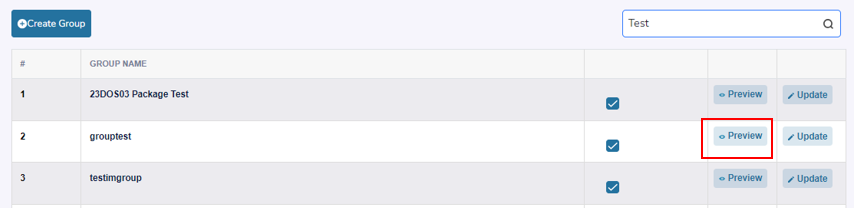
You can review which studies you have applied the group code to by clicking on the "Preview" option next to your "Group Name."

In our example, any respondents who completed from 388333-CN will not be able to complete on 388333-EN, and vice versa.

2. Alternative Method
The alternative method for group security can be used when you need to add group security to a project that has already been "Completed & Approved."
Select Group Security.
Search for the “Group Name” you would like to use.
Select “Preview.”
Select “Add More.”

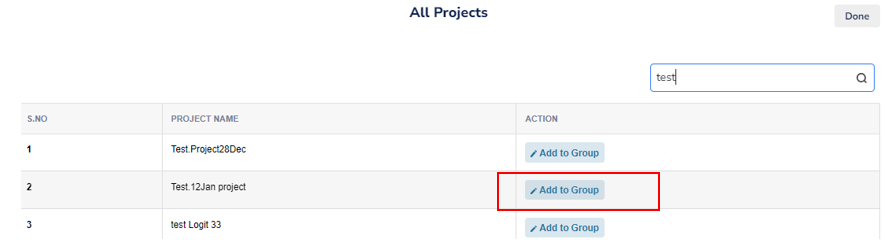
Search by “Project Name.”
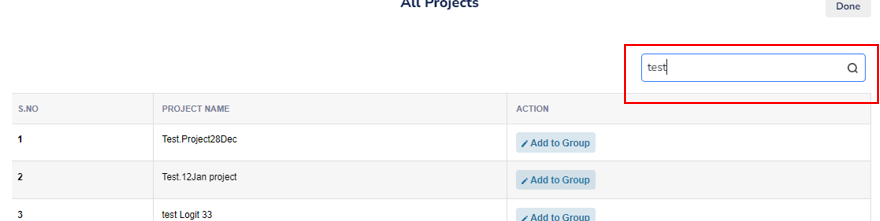
Select “Add to Group” to add the project to your group security. Confirm by selecting "Yes, Add it!"
Reconciliation and Closure Process
At Zamplia, we understand that some cases may be removed after your internal data checks. Please complete the following steps upon closure, regardless of whether your project requires it or not.
When you've finished fielding a project, switch the status of your study from "Live or Hold" to “Complete.”
A. If you need to remove IDs due to poor quality, proceed to step 2.
B. If your final completes are already accurately tracked on Zamplia, proceed to step 6.
Create a CSV file that only includes all the valid final completes for your study. The file should have one ID per line and should list the PID ID.
You can find the PID IDs from the “Reports” tab.
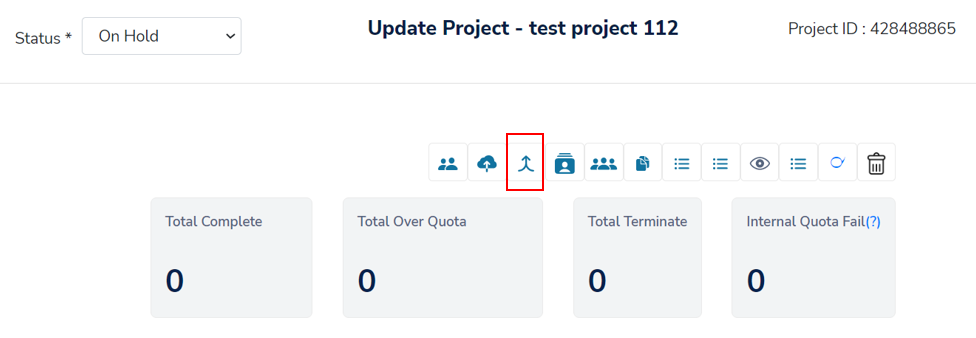
Locate the Reconciliation icon on the project that you want to close.
Click on “Select File” and upload your .csv file for the study.
Helpful Hint: Ensure that there are no test IDs, duplicates, or blank cells in your file.
Select all IDs that appear on the screen, this will confirm the changes you have made to each case. When ready, click the "Reconcile" button.
Select “Reconciliation Summary” to review the breakdown of vendor completes, removals, and final cost.
To approve the final cost listed click on “Save and Reconcile Vendors.” If revision is needed, repeat step 4.
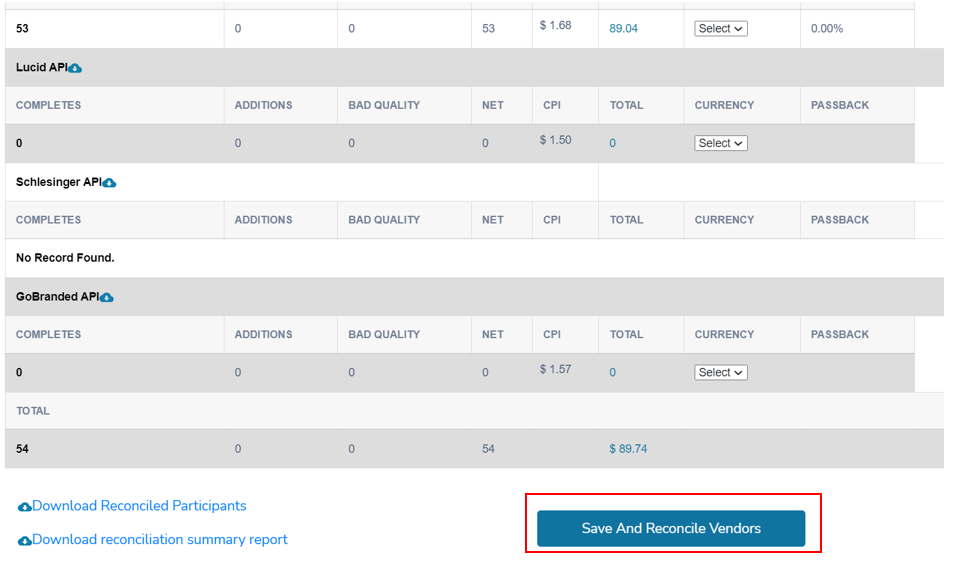
Your project is now officially closed and its status is "Complete Approved." This alerts us that the study can proceed with the billing process.
Studies with "Completes Approved" status will now be found in the “Invoice” tab.
Your study will have PO shared with us from the start of project creation. However in the case you need to update you can re-enter the Purchase Order (PO) for your project and click the check button to confirm it.

Click “Agree” to let us know that we can proceed with billing for the project.
Multiple Setups
In the case of multiple setups of a single survey (i.e., a project with multiple clones), you can reconcile all associated setups (the main setup and its clones) at once using the "Multiple Reconcile" option in the "Reconciliation" tab.
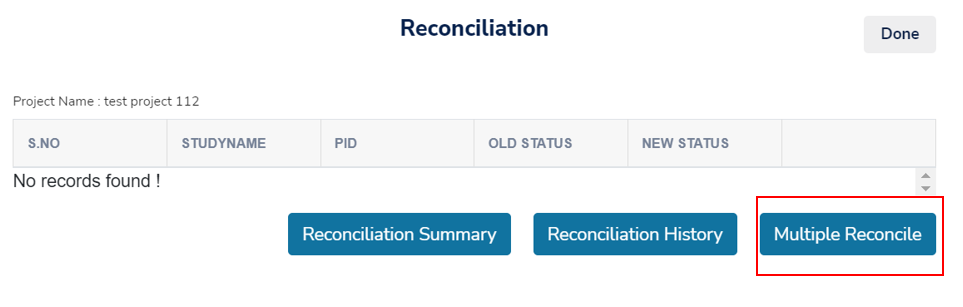
Select Multiple Reconcile to begin reconciling parent project and its clones.
Select the setups you want to reconcile.
Upload the CSV file with the final IDs from the multiple setups.
Follow steps 5 to 11 from Reconciliation and Closure Process.
Reconciliation Policy
Zamplia provides buyers with the ability to request the removal of survey responses that fail to meet quality criteria. This guide explains:
- The circumstances under which such requests are appropriate
- How to properly submit a reconciliation
- The responsibilities of buyers during this process
Please be aware that Zamplia may ask for documentation to support reconciliation requests. Any submissions lacking justification or failing to follow the stated procedures may be rejected.
Acceptable Reasons for Reconciliation
The following responses are valid reasons for disqualification:
1. Straight Lining
Description: Respondent selects the same response option across multiple questions, showing a lack of attention. Required Evidence: Zamplia’s UIDs, questionnaire and responses.
2. Speeding
Description: Respondent completes the survey significantly faster than the average, suggesting rushed or insincere participation.
Required Evidence: UIDs, length of interview (LOI), entry and exit times compared to the average LOI.
3. Complete Not Reflected on Client Side
Description: A respondent is marked as complete in Zamplia’s system, but there’s no corresponding data in the client’s survey.
Required Evidence: UIDs with response codes or complete status.
Note: Secure redirect or link validation must be in place to remove for this reason. See Zamplia’s Link Security Best Practices for details.
4. Inappropriate Open-Ended Responses
Description: Responses that are repetitive, vulgar, nonsensical, irrelevant, or made up of random text.
Required Evidence: UIDs and open-ended answers.
5. Mismatched Responses
Description: Discrepancies between profile data and survey responses (e.g., age or gender mismatch).
Required Evidence: UIDs, qualification data, and in-survey responses.
6. Duplicate Responses
Description: Identical open-ended responses across multiple respondents.
Required Evidence: RIDs and corresponding answers.
Unacceptable Reasons for Reconciliation
The following are not acceptable for disqualifying respondents:
Survey-side setup errors – Issues in survey logic or design
Inaccurate CPI – Launching with an incorrect cost-per-interview
Incorrect Qualifications or Quotas – Improper targeting or quota configuration
Project Overfilling – Failing to apply the correct Quota Calculation Type
Reconciling to Complete
If a technical issue prevents a complete from being recorded, buyers must reconcile the session to ensure proper compensation. To do so, submit a list of valid (complete) UIDs and approve any changes noted by the system.
Reconciliation Timeline
Reconciliations must be submitted within 15 business days of project inactivity. A study is considered inactive if it has not received any completes for more than 15 business days.
Once a status is set to Complete and Approved, it cannot be reversed.
Best Practice: Reconcile as soon as final IDs are available to ensure timely processing and support.
How to Submit a Reconciliation Report
Please review our step-by-step guide for Zamplia’s Reconciliation and Closure Process.
Reconciliation Audits
Reconciliations are subject to random audits. If your study is selected:
You’ll be asked to provide justification for each reconciled ID.
A prompt response is required.
If any IDs were reconciled without valid reasons, the changes may be reversed.
For more guidance, refer to Reconciliation Audits in the support documentation.
Reconciliation Audits
Zamplia provides a Reconciliation Status Report feature that enables buyers to remove survey completes that do not meet quality standards. To maintain transparency and ensure the integrity of our platform, these reconciliations are regularly audited. These audits help us gain better insights into the reasons behind reconciliations and allow us to work with suppliers to improve panelist quality.
How Do Reconciliation Audits Work?
Version 1
When a reconciliation request is submitted, it may be selected for a Reconciliation Audit. If selected, an email will be sent to the assigned Project Manager. This email will include the survey number and the respondent IDs (UIDs) that were reconciled, along with a request for additional information to support the reconciliation decision.
The email will also include a deadline by which the requested form or information must be submitted. The Deadline will be 48 business hours.
Zamplia will review the submitted details to confirm that the reconciliations were made for valid reasons. Zamplia reserves the right to request supporting documentation and may reverse reconciliations that are not justified or submitted beyond the given time frame.
Version 2
When a reconciliation request is submitted, it may be selected for a Reconciliation Audit. If selected, the assigned Project Manager will not be allowed to proceed with the submission unless additional data is provided. You will be required to submit the respondent IDs (UIDs) that were reconciled, along with the reasons for their removal. You may also upload additional supporting documents if you deem them relevant as evidence.
Zamplia will review the submitted details to ensure that the reconciliations were made for valid reasons. Zamplia reserves the right to request further documentation and may reverse reconciliations that are not justified.
What Should a Project Manager Do Upon Receiving a Reconciliation Audit Email?
Review the audit email carefully.
A response is required for your study to be marked as complete and approved.
Why Does Zamplia Conduct Reconciliation Audits?
Data quality is a top priority at Zamplia. Reconciliation audits are a crucial part of ensuring the platform remains a reliable space for all participants.
They:
Promote better understanding of why reconciliations occur.
Provide feedback to suppliers for improving panel quality.
Help identify gaps in survey setup, respondent experience, or training.
Maintain a secure and trustworthy environment for buyers and suppliers.
Repeated or excessive reconciliations may also trigger audits. In such cases, buyers may receive guidance from the Zamplia team along with opportunities to reduce their reconciliation rates.
However, please note that Zamplia reserves the right to temporarily suspend reconciliation privileges if repeated unjustified reconciliations continue without improvement.
Invoice Tab
The Invoice tab displays all your projects that are Complete Approved and are ready to be billed. You can access the final details, such as the number of completes achieved, final cost, and the project PO, for each project. The final cost is the total amount accumulated for the project from vendors who provided field and/or added security features cost from Zamplia. To view the cost breakdown per vendor, access the "Reconciliation Summary" for each project.
If there are any discrepancies in the amounts, feel free to reach out to our support team for clarification.
Archive Tab
Projects older than six months will be moved from the “Projects” tab to the "Archive" tab, where you can search for them using the search button.
Steps To Setup Another User
Go to the “Settings” tab.
Click on “Users” in the top left corner.
Select “Create user.”
Fill in all required fields for the user account you want to create.
In the "Role" option, you will see two types of roles:
A. Client – This is the role of an administrator, like yourself. Anyone with this role can see all projects managed by any project manager users and can also create more users.
B. Client Project Manager – This role can only create and monitor projects.
Click “Create” to create the user account
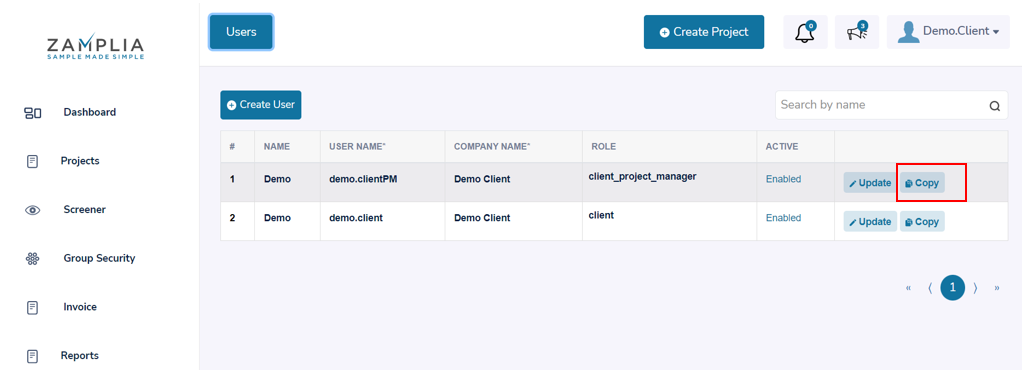
The newly created user account will now be visible in the list of users. You can copy the user's credentials by selecting "Copy" next to the user.
Activity Log
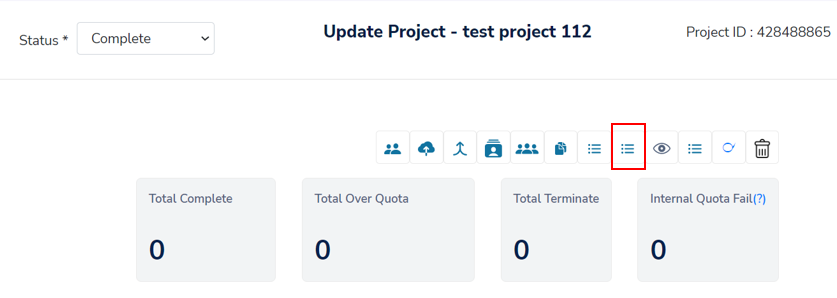
The "Activity Log" feature allows you to track any changes made to a project. You can check the date and time of any specific change by using the "Activity" icon located on the main page of the project.
Issue Reporting (Jira)
Creating and Managing a Support Ticket in Zamplia
If you need assistance or have any concerns regarding Zamplia, you can raise a support ticket by following the steps below. This will help our team investigate and resolve your issue more effectively.
Step 1: Accessing the Ticket Form
- Click on Submit Feedback within the platform.
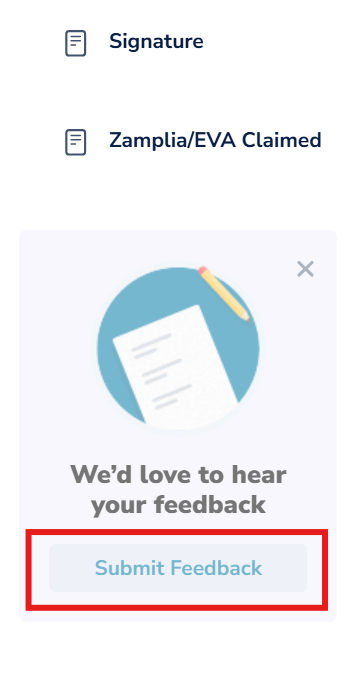
- You will be redirected to a new tab for Zamplia Support.
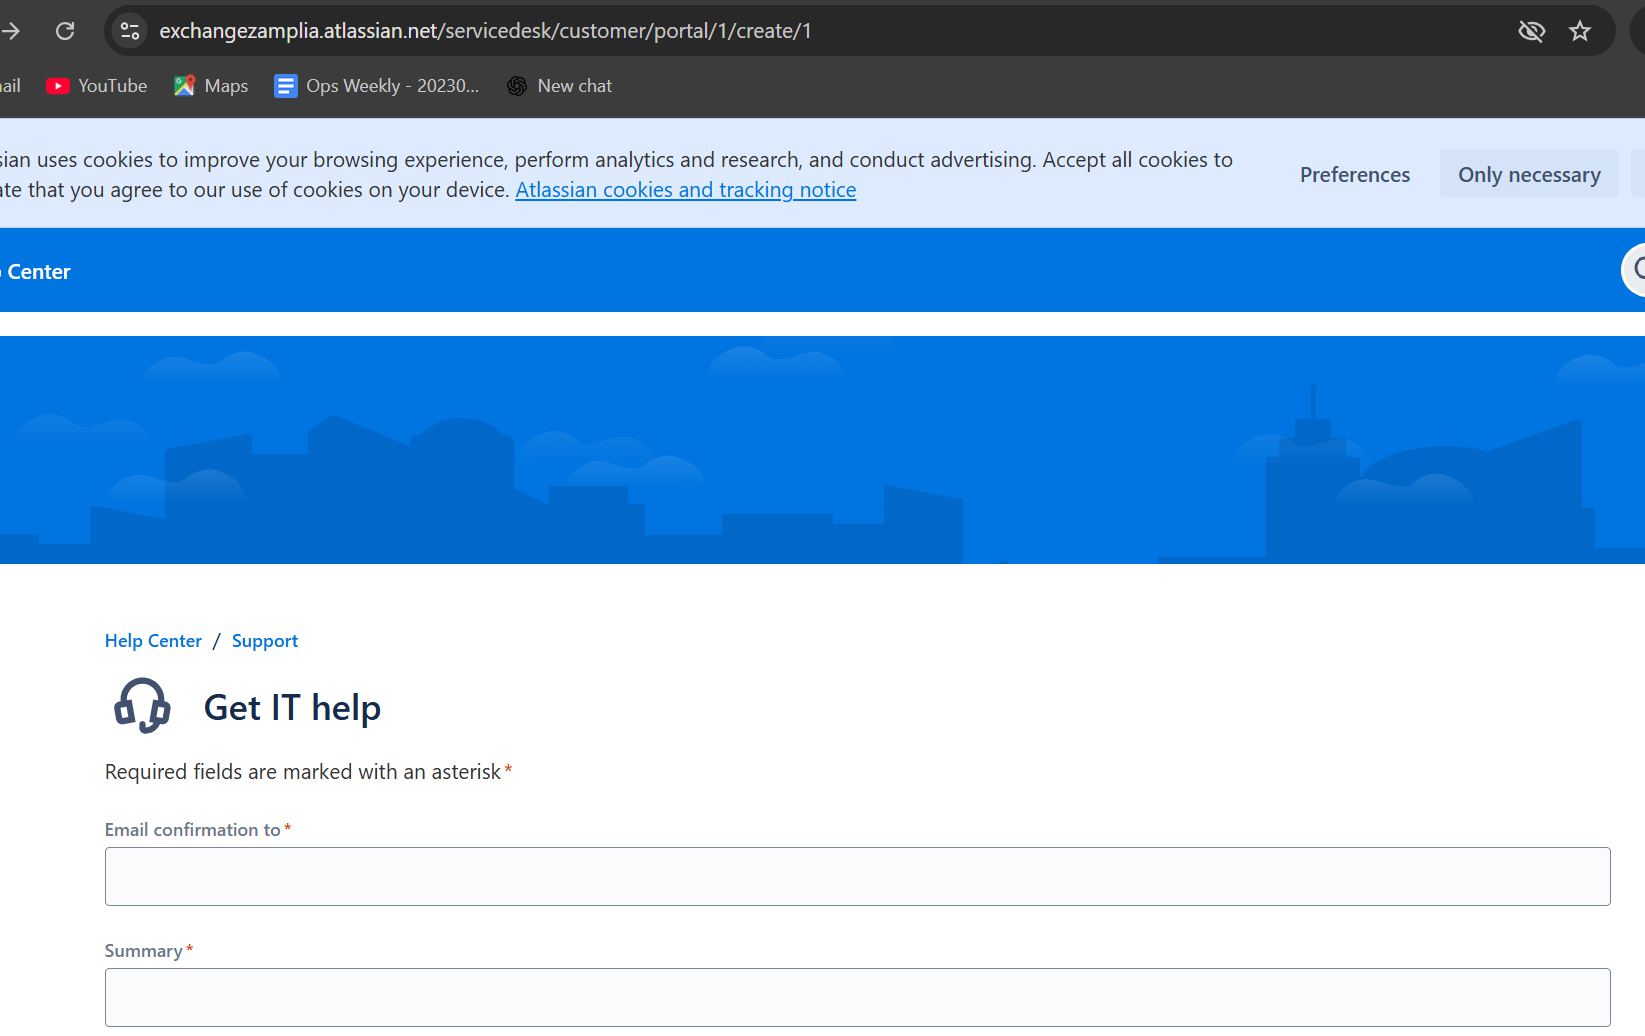
Step 2: Filling Out the Ticket Form
When filling out the form, kindly complete the following fields carefully:
• Email Confirmation To: Enter your email address. You will receive all updates regarding your ticket here.

• Summary: Clearly mention the topic/title of your concern.

• Explain What Caused the Issue: Provide all relevant information about the problem.

o Include a step-by-step explanation so our team can reproduce the issue on their end.
o The clearer your explanation, the faster we can identify and resolve the concern.
• Priority: Select the priority level based on the urgency of the concern.

o High: Immediate impact on project or work.
o Medium: Needs attention but not urgent.
o Low: Minor issue or general inquiry.
• Attach Documents:

o Add any supporting files/screenshots that may help our team investigate the issue.
o You can either drag and drop files into the Drop files to attach section or click Browse to select them from your system.
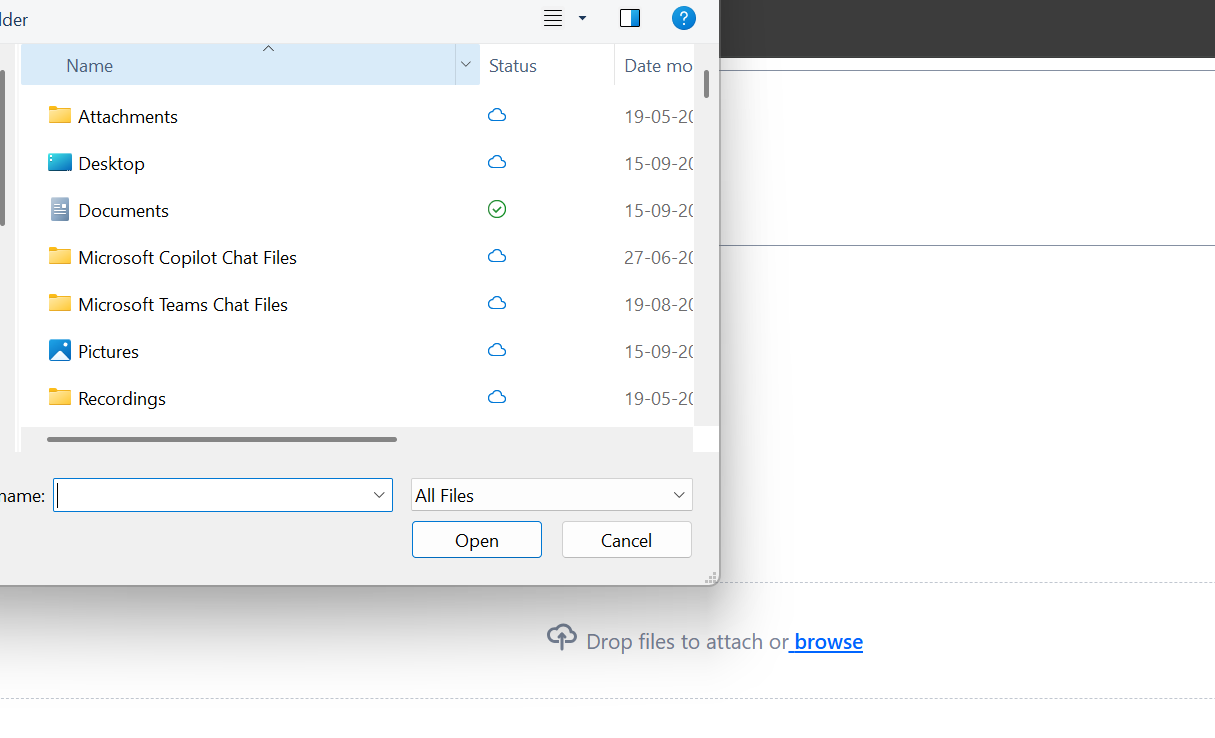
o After choosing the file(s), click Open to attach them.
Step 3: Review Before Submission
Before sending your ticket, kindly review all fields:
• Email
• Summary
• Explain What Caused the Issue
• Priority
• Attached Documents
If everything looks correct, click Send.
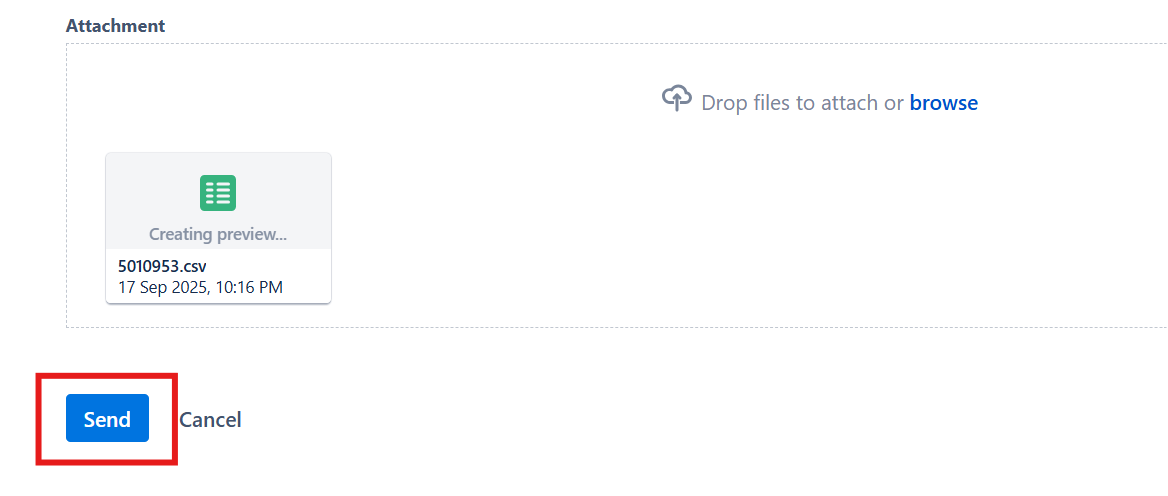
• Your ticket will be submitted to Zamplia Support and you will receive the confirmation message.
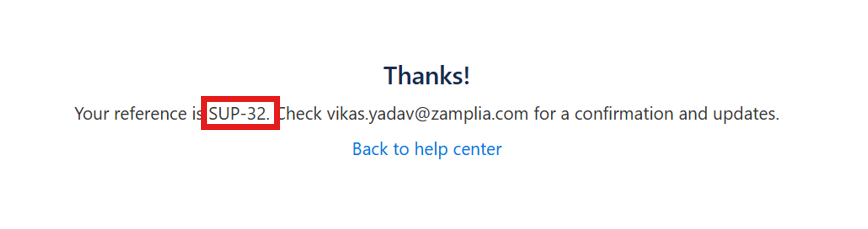
• You will receive a confirmation email with your ticket number (e.g., SUP-32).
Step 4: Confirmation and Tracking
You will receive below mentioned email on shared email ID.
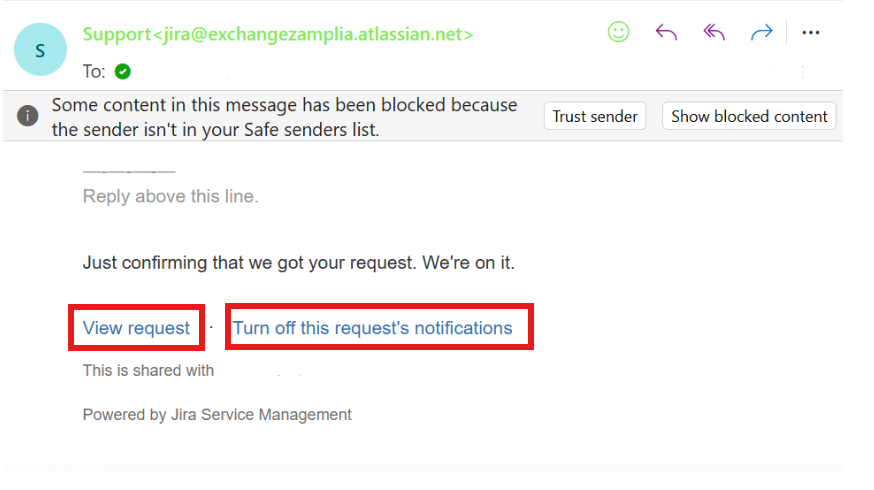
• In the confirmation email, click View Request to see all details of your ticket.
• This section will also show all updates and activities related to your ticket.

Step 5: Ticket Management Options
On the right-hand side of your ticket page, you will find several options:
• Status: View the current status of your ticket.
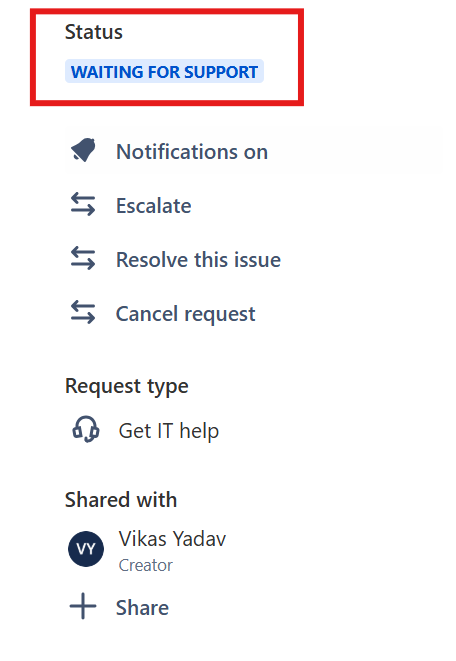
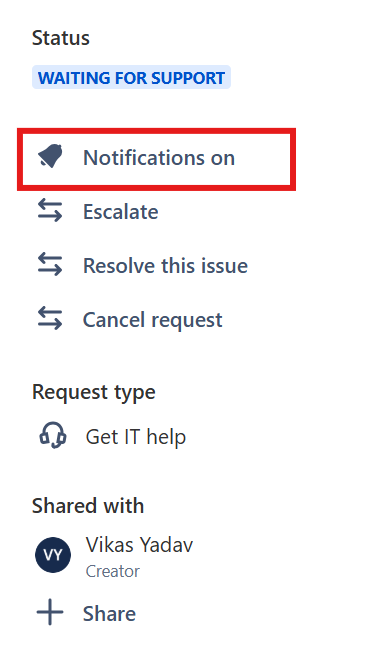
• Notifications On/Off: Enable or disable notifications for this ticket.
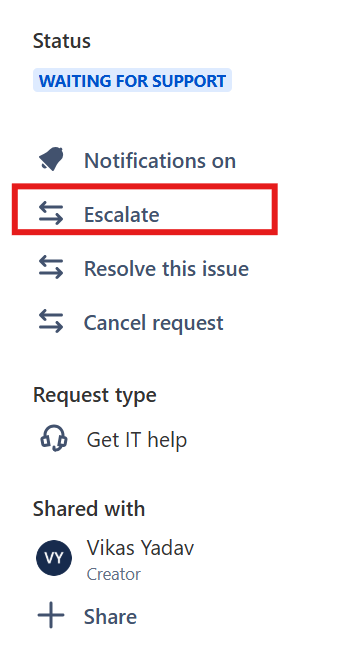
• Escalate: Add additional information and escalate the ticket if needed.
• Resolve This Issue: If your issue has been resolved on your end, you can close the ticket by providing confirmation.
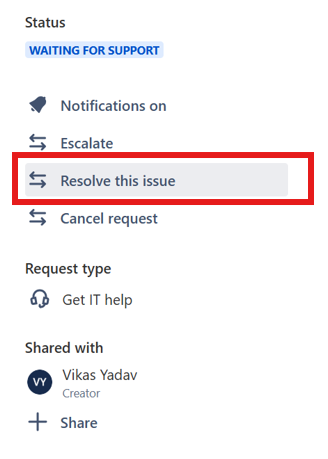
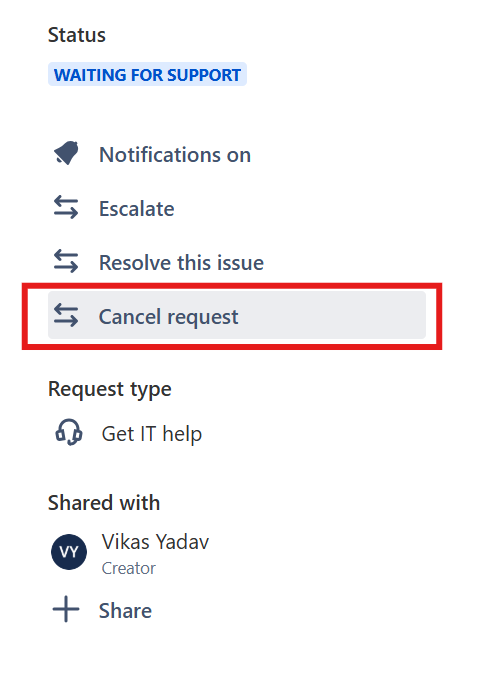
• Cancel Request: If the ticket was created by mistake, you can cancel it.
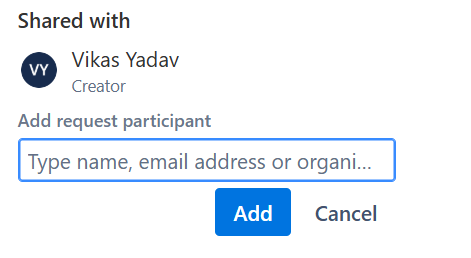
• Share: Share the ticket with your internal team or someone from Zamplia Support.
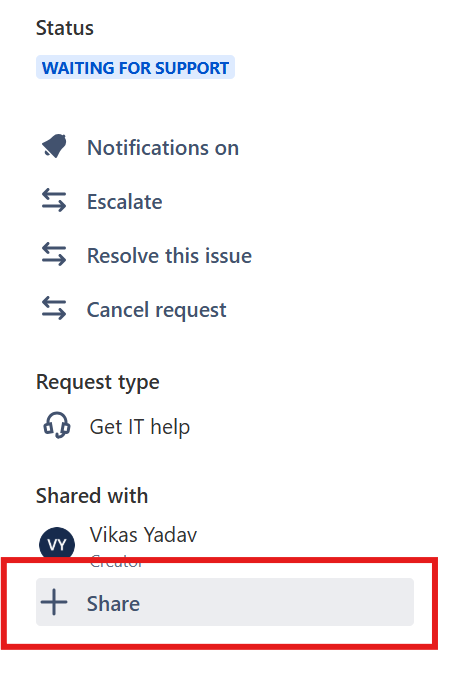
o Enter the email address of the person you want to share the ticket with and click Add.
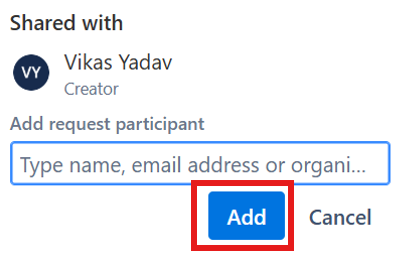
After clicking on share, kindly provide the email address of that person with whom you wanted to share this ticket. Then click on Add to send this ticket to that person.