Reconciliation and Closure Process
At Zamplia, we understand that some cases may be removed after your internal data checks. Please complete the following steps upon closure, regardless of whether your project requires it or not.
When you've finished fielding a project, switch the status of your study from "Live or Hold" to “Complete.”
A. If you need to remove IDs due to poor quality, proceed to step 2.
B. If your final completes are already accurately tracked on Zamplia, proceed to step 6.
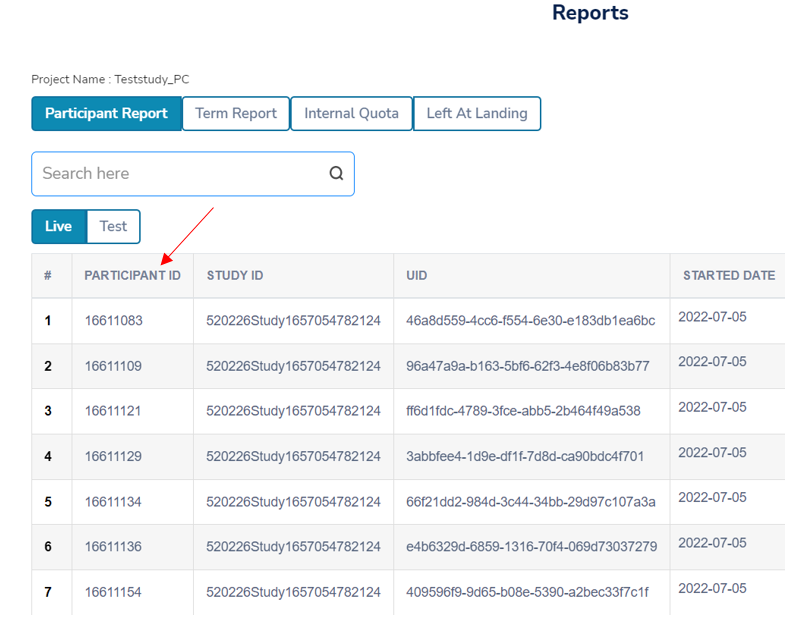
Create a CSV file that only includes all the valid final completes for your study. The file should have one ID per line and should list the PID ID.
You can find the PID IDs from the “Reports” tab.
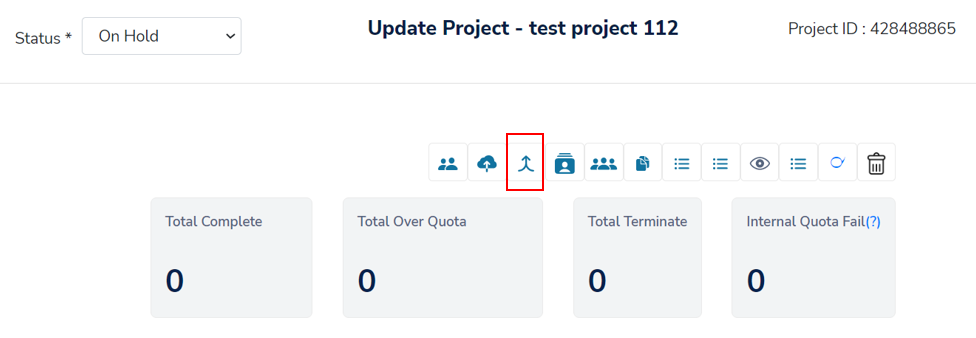
Locate the Reconciliation icon on the project that you want to close.
Click on “Select File” and upload your .csv file for the study.
Helpful Hint: Ensure that there are no test IDs, duplicates, or blank cells in your file.
Select all IDs that appear on the screen, this will confirm the changes you have made to each case. When ready, click the "Reconcile" button.
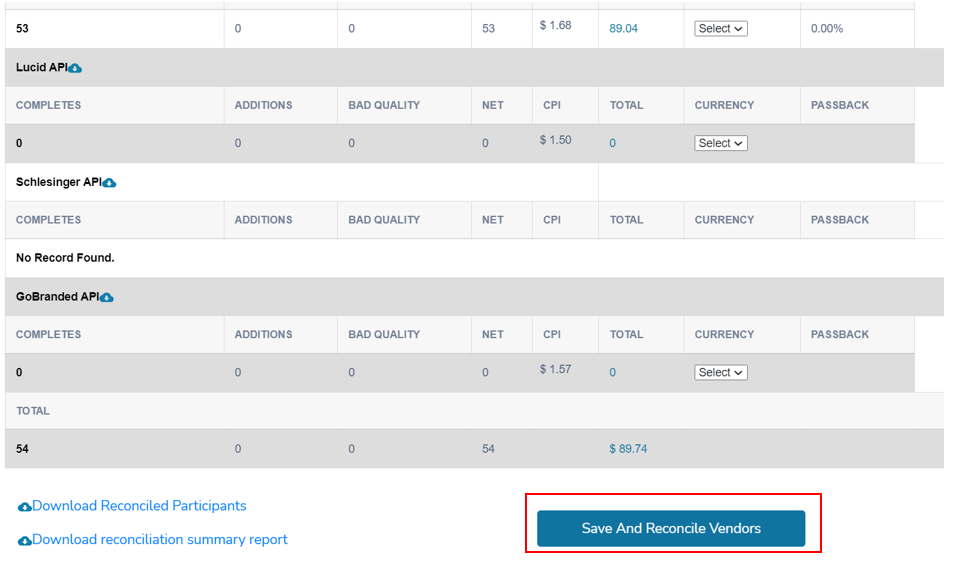
Select “Reconciliation Summary” to review the breakdown of vendor completes, removals, and final cost.
To approve the final cost listed click on “Save and Reconcile Vendors.” If revision is needed, repeat step 4.
Your project is now officially closed and its status is "Complete Approved." This alerts us that the study can proceed with the billing process.
Studies with "Completes Approved" status will now be found in the “Invoice” tab.
Your study will have PO shared with us from the start of project creation. However in the case you need to update you can re-enter the Purchase Order (PO) for your project and click the check button to confirm it.

Click “Agree” to let us know that we can proceed with billing for the project.